Schedules & Escalations
Schedules decide who is on call; escalation policies decide what happens when that person doesn't respond. Together they are the guarantee that every alert reaches a human. Set them up once and OpsPing does the chasing.
- Admin access to the console (creating schedules and policies is an admin action).
- At least two users in your workspace — a rotation of one is a pager glued to your hip.
-
Create a schedule with a weekly rotation
Go to Schedules and click New Schedule. Give it a name that says what it covers (e.g.
Primary On-Call), set the timezone the team actually lives in — all handoff math respects it — then add a rotation. A rotation has a cadence (daily or weekly), a handoff time, and an ordered participant list. The classic setup: weekly cadence, Monday 09:00 handoff, participants in the order you want the pager to move.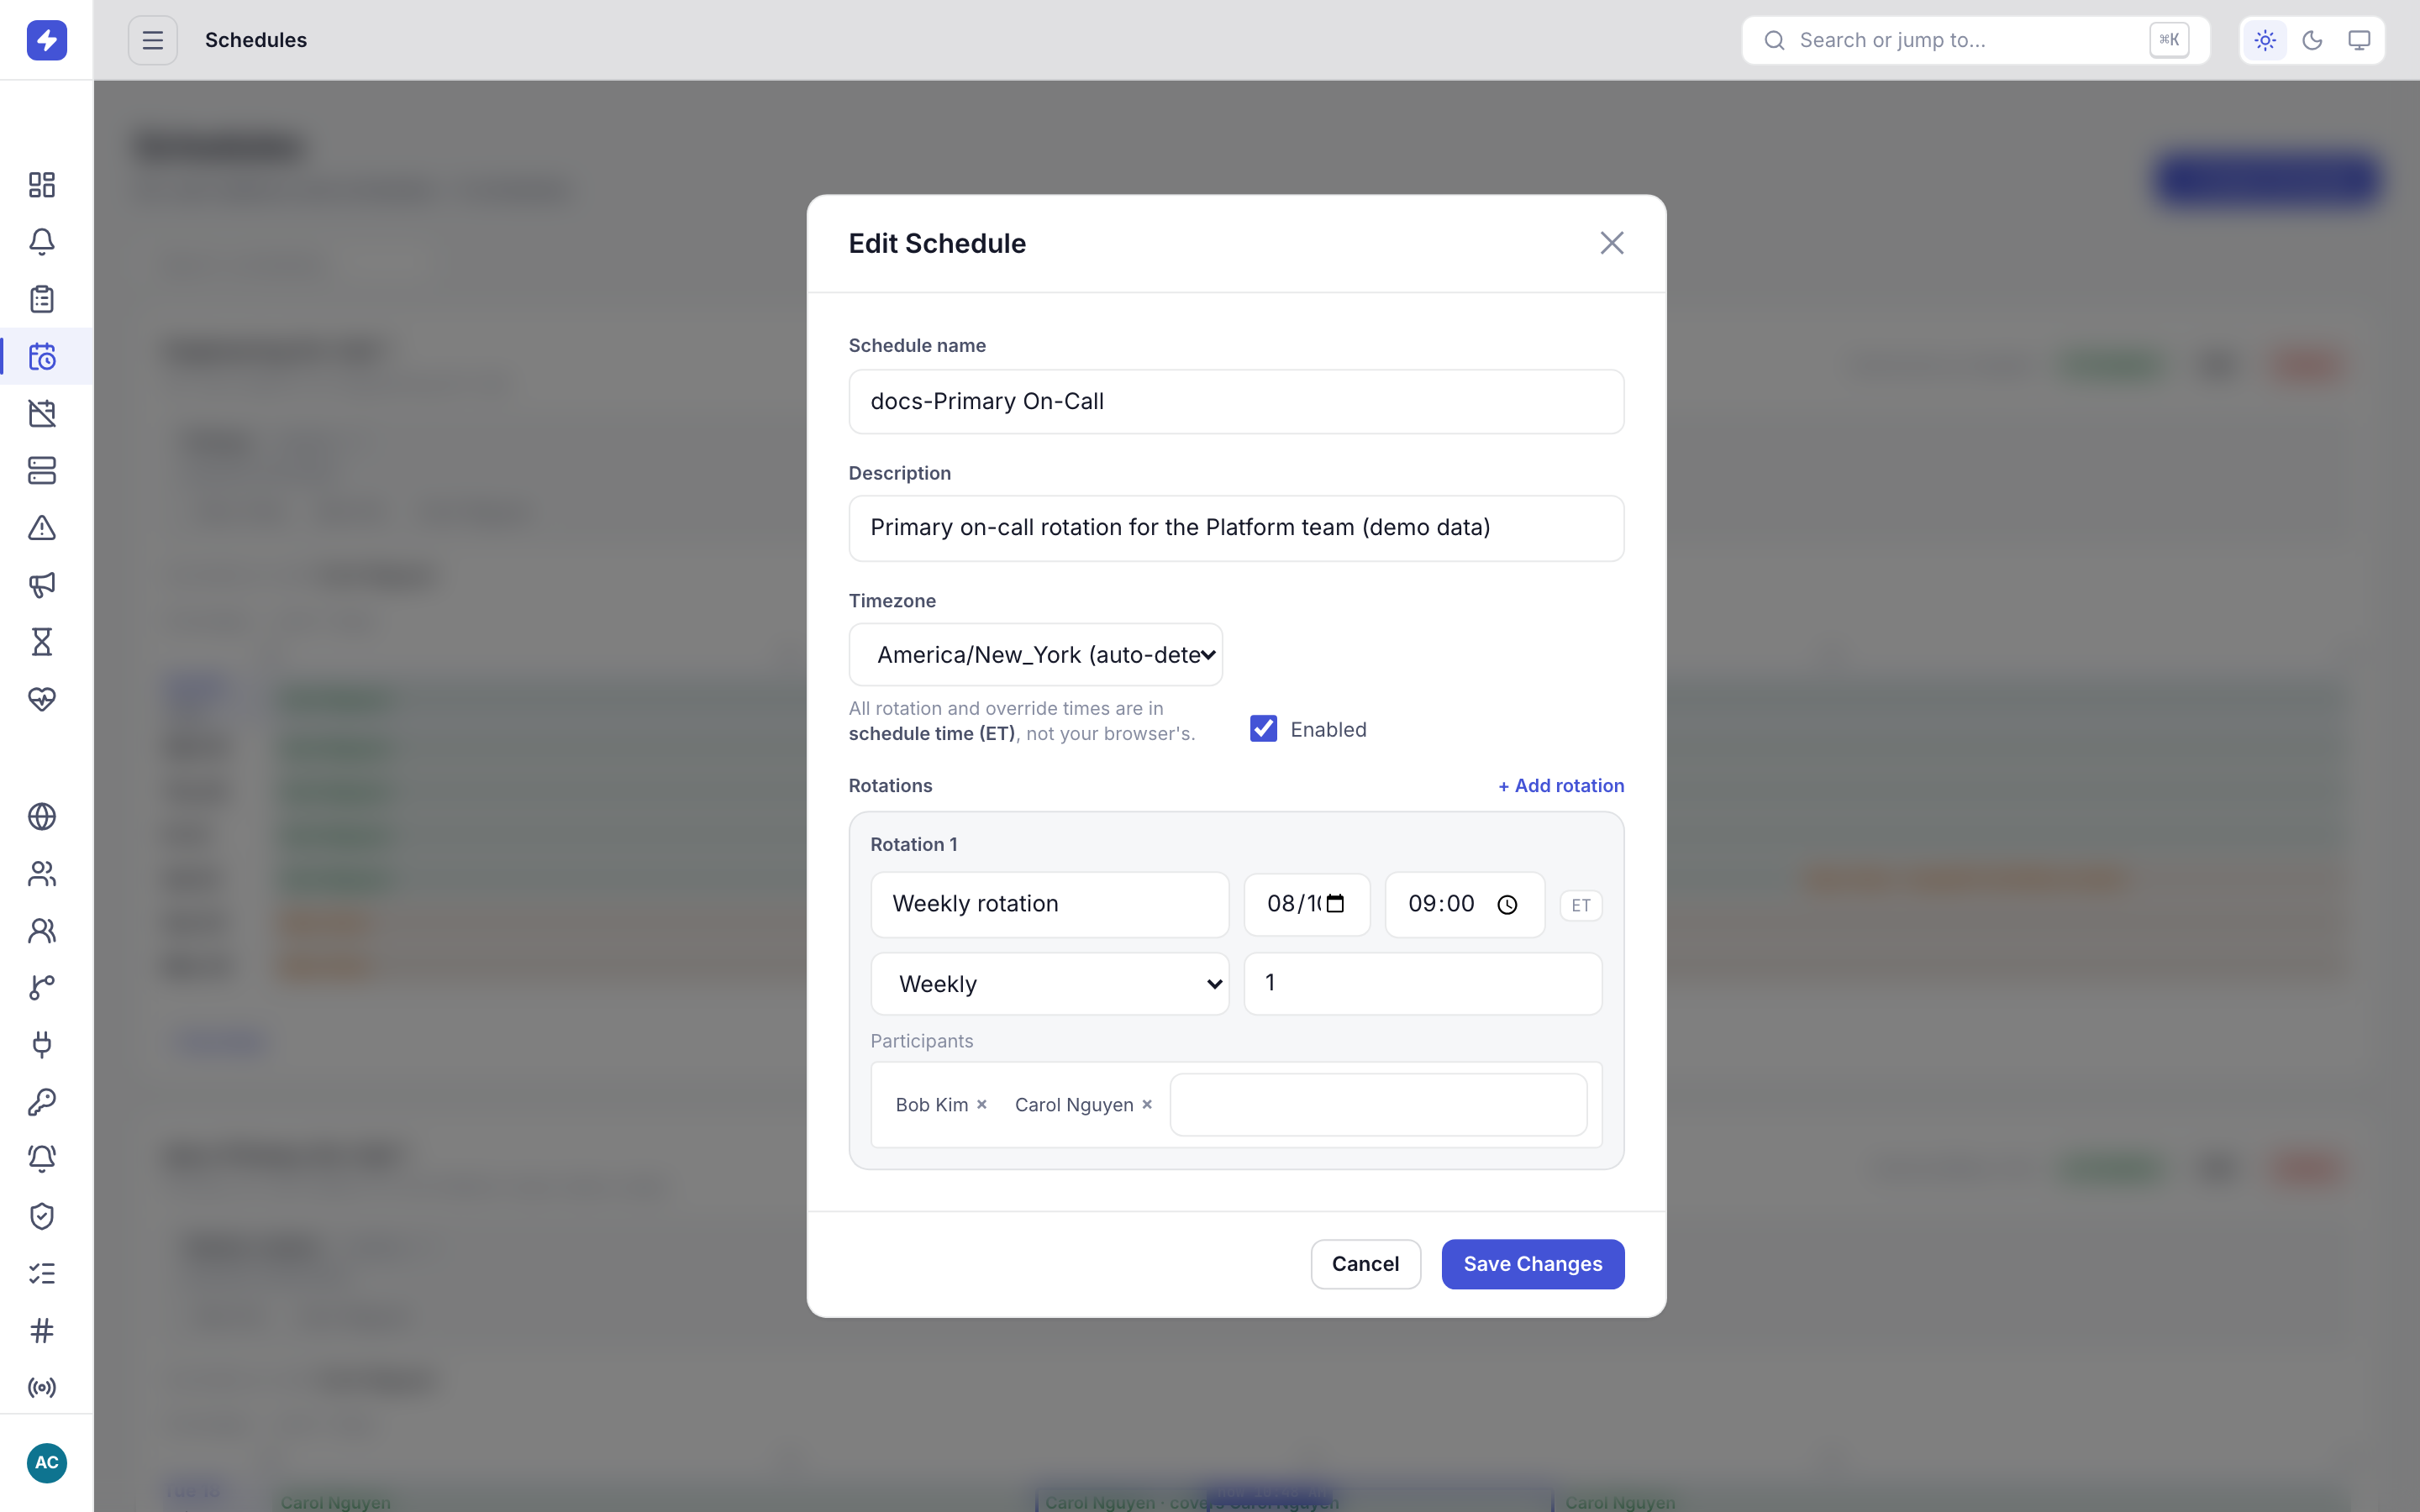
The schedule editor: name, timezone, and the rotations editor where you define cadence, handoff time, and participants. TipHandoff time matters more than people think. Monday 09:00 means the outgoing on-call can brief the incoming one. Monday 00:00 means the pager changes hands while everyone is asleep — and the first alert of the week lands on someone who hasn't had coffee.
-
Add time restrictions for follow-the-sun or business hours
By default a rotation covers 24/7. Add a time restriction to a rotation to limit when it is active — for example weekdays 09:00–17:00 for a business-hours tier, or a night-window rotation that hands off between regions. Outside the restricted window the schedule reports nobody on call from that rotation, so pair restrictions with a second rotation (or an escalation fallback) or alerts will have no one to page.
WarningA schedule with nobody on call pages nobody. If you restrict a rotation to business hours, make sure the escalation policy attached to those alerts has a rule that catches the gap — otherwise the 2 a.m. P1 goes nowhere.
-
Read the schedules list at a glance
The Schedules page is your coverage overview. Each card shows the schedule's rotations, participants, timezone, who is on call right now, and any active overrides — so "who do I call about payments?" is a one-second answer.
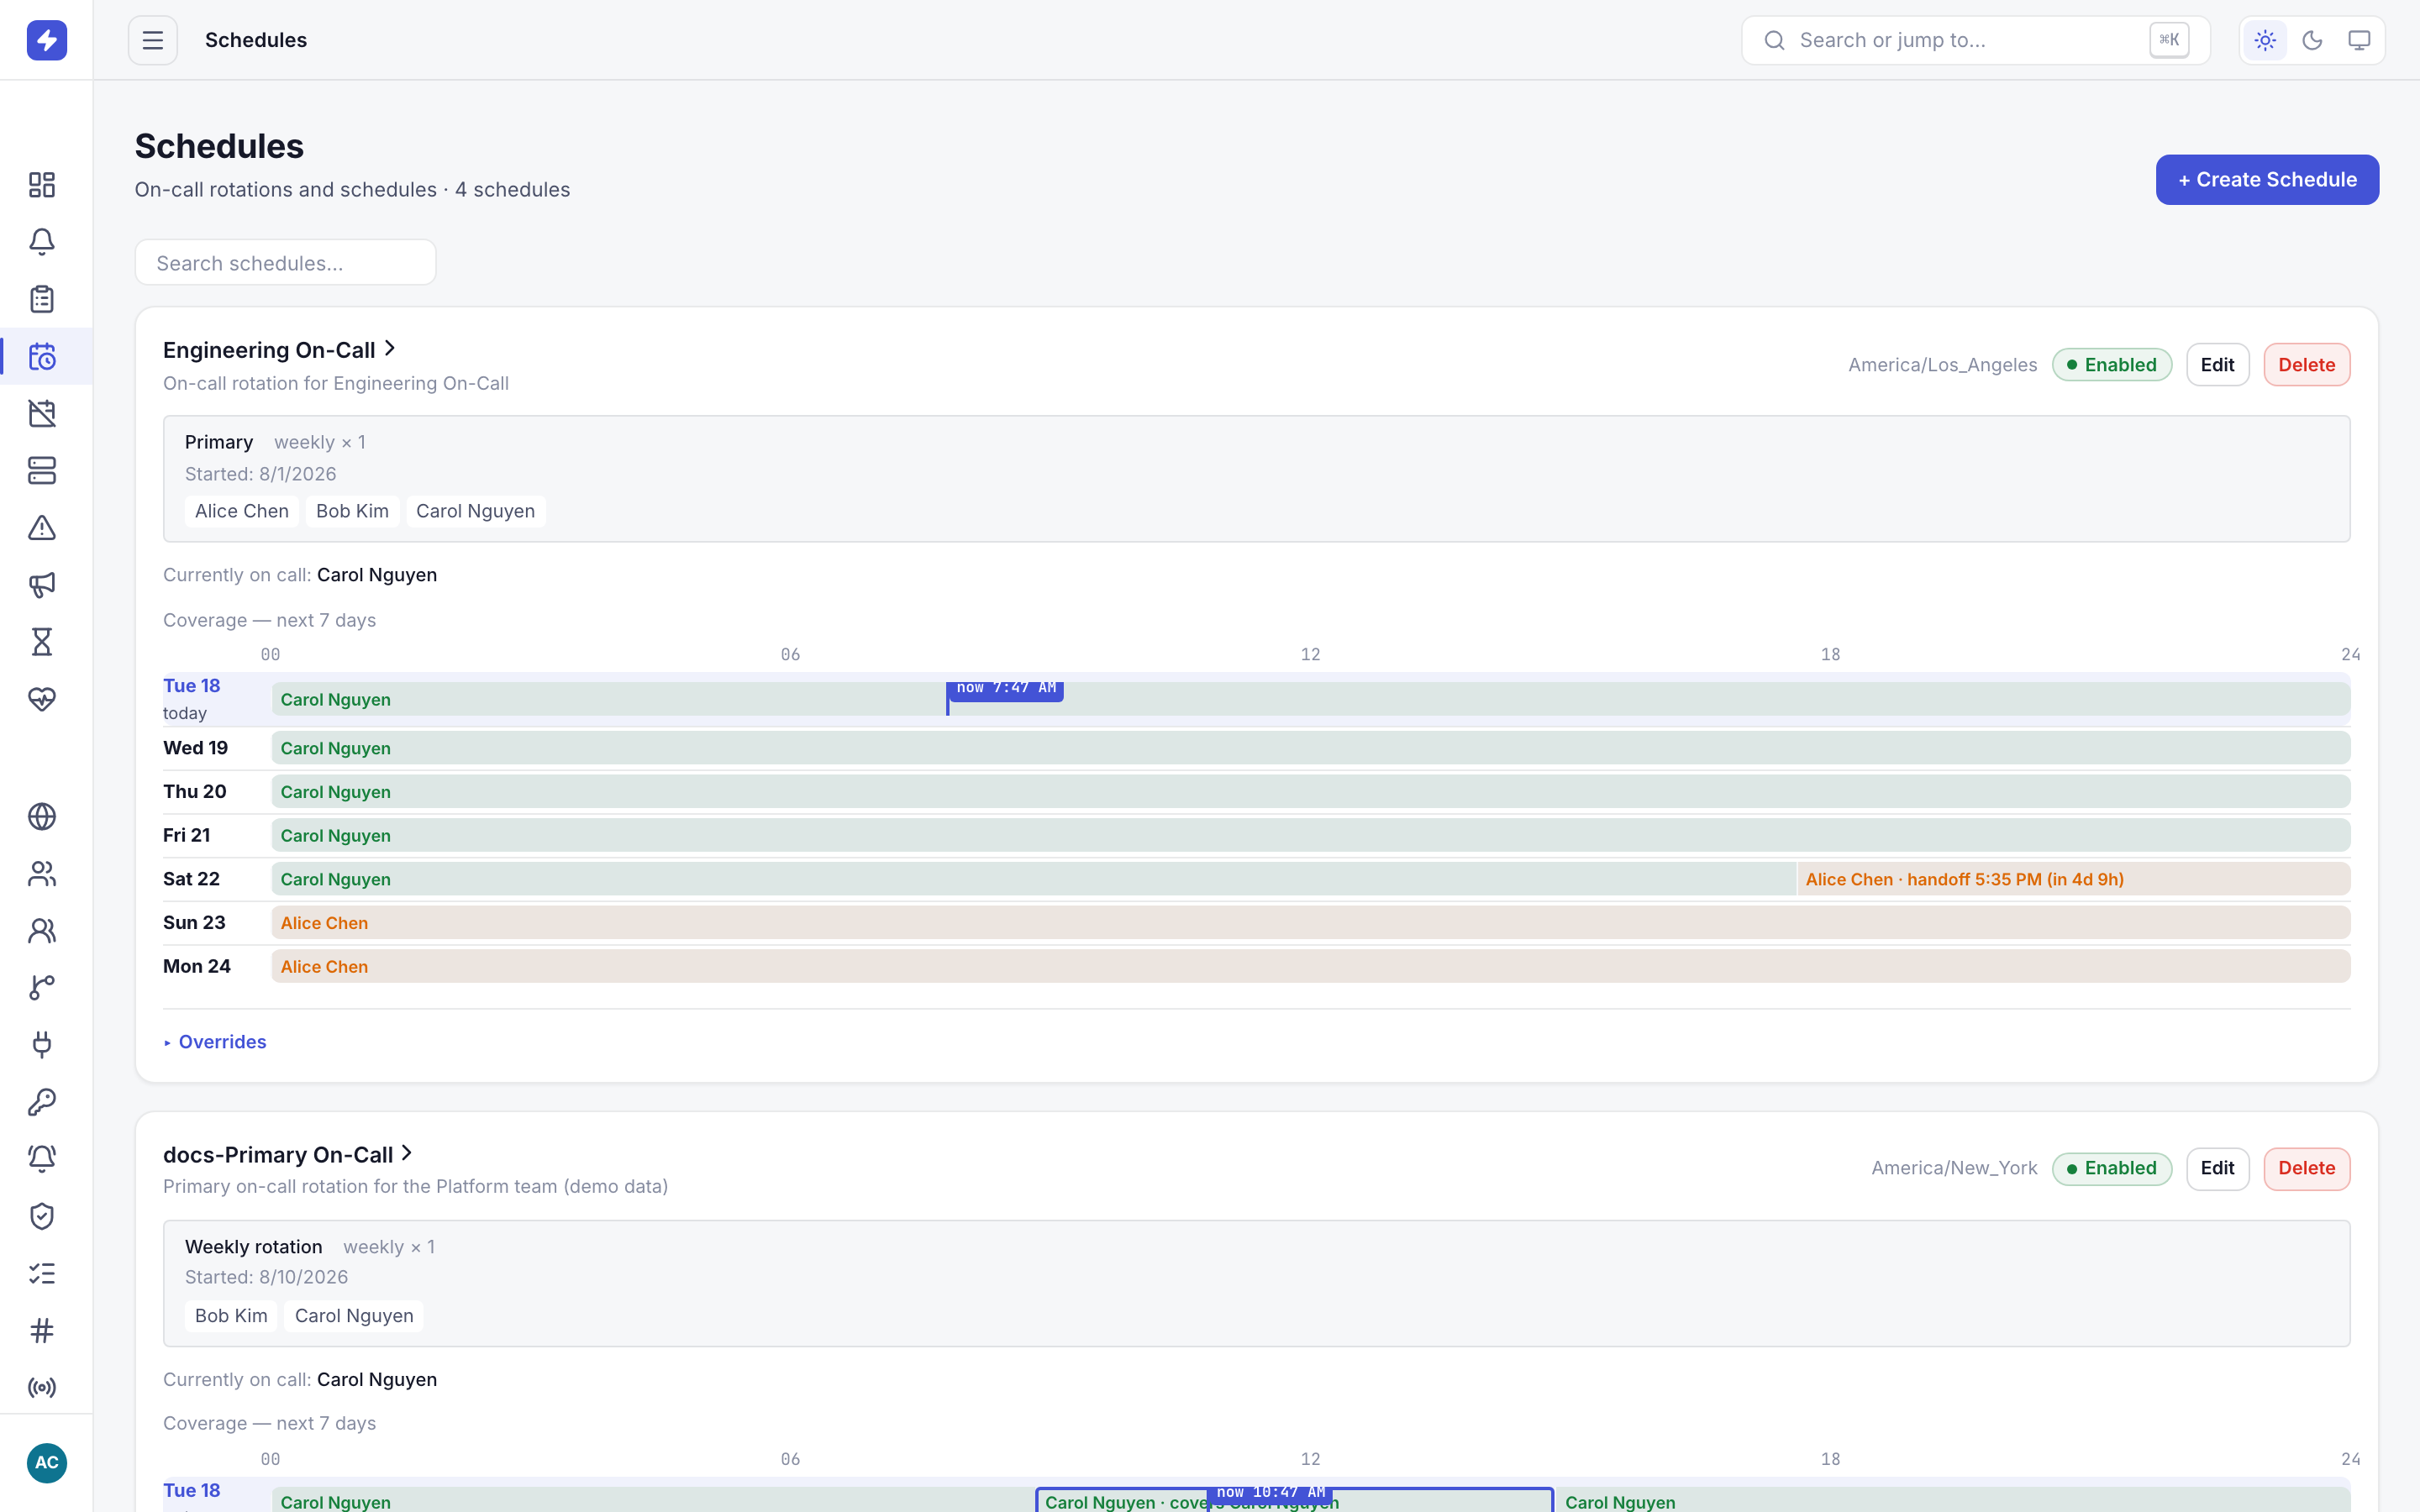
Each schedule card summarizes its rotations, participants, timezone, who is currently on call, and any overrides. -
Open the schedule detail for the full picture
Click a schedule to see its detail page: On-Call Now (including whether an override, not the rotation, is the source of current coverage), who's up next, the full rotation table, and the overrides list. This is the page to check before you assume the person you're about to call is actually the person on duty.
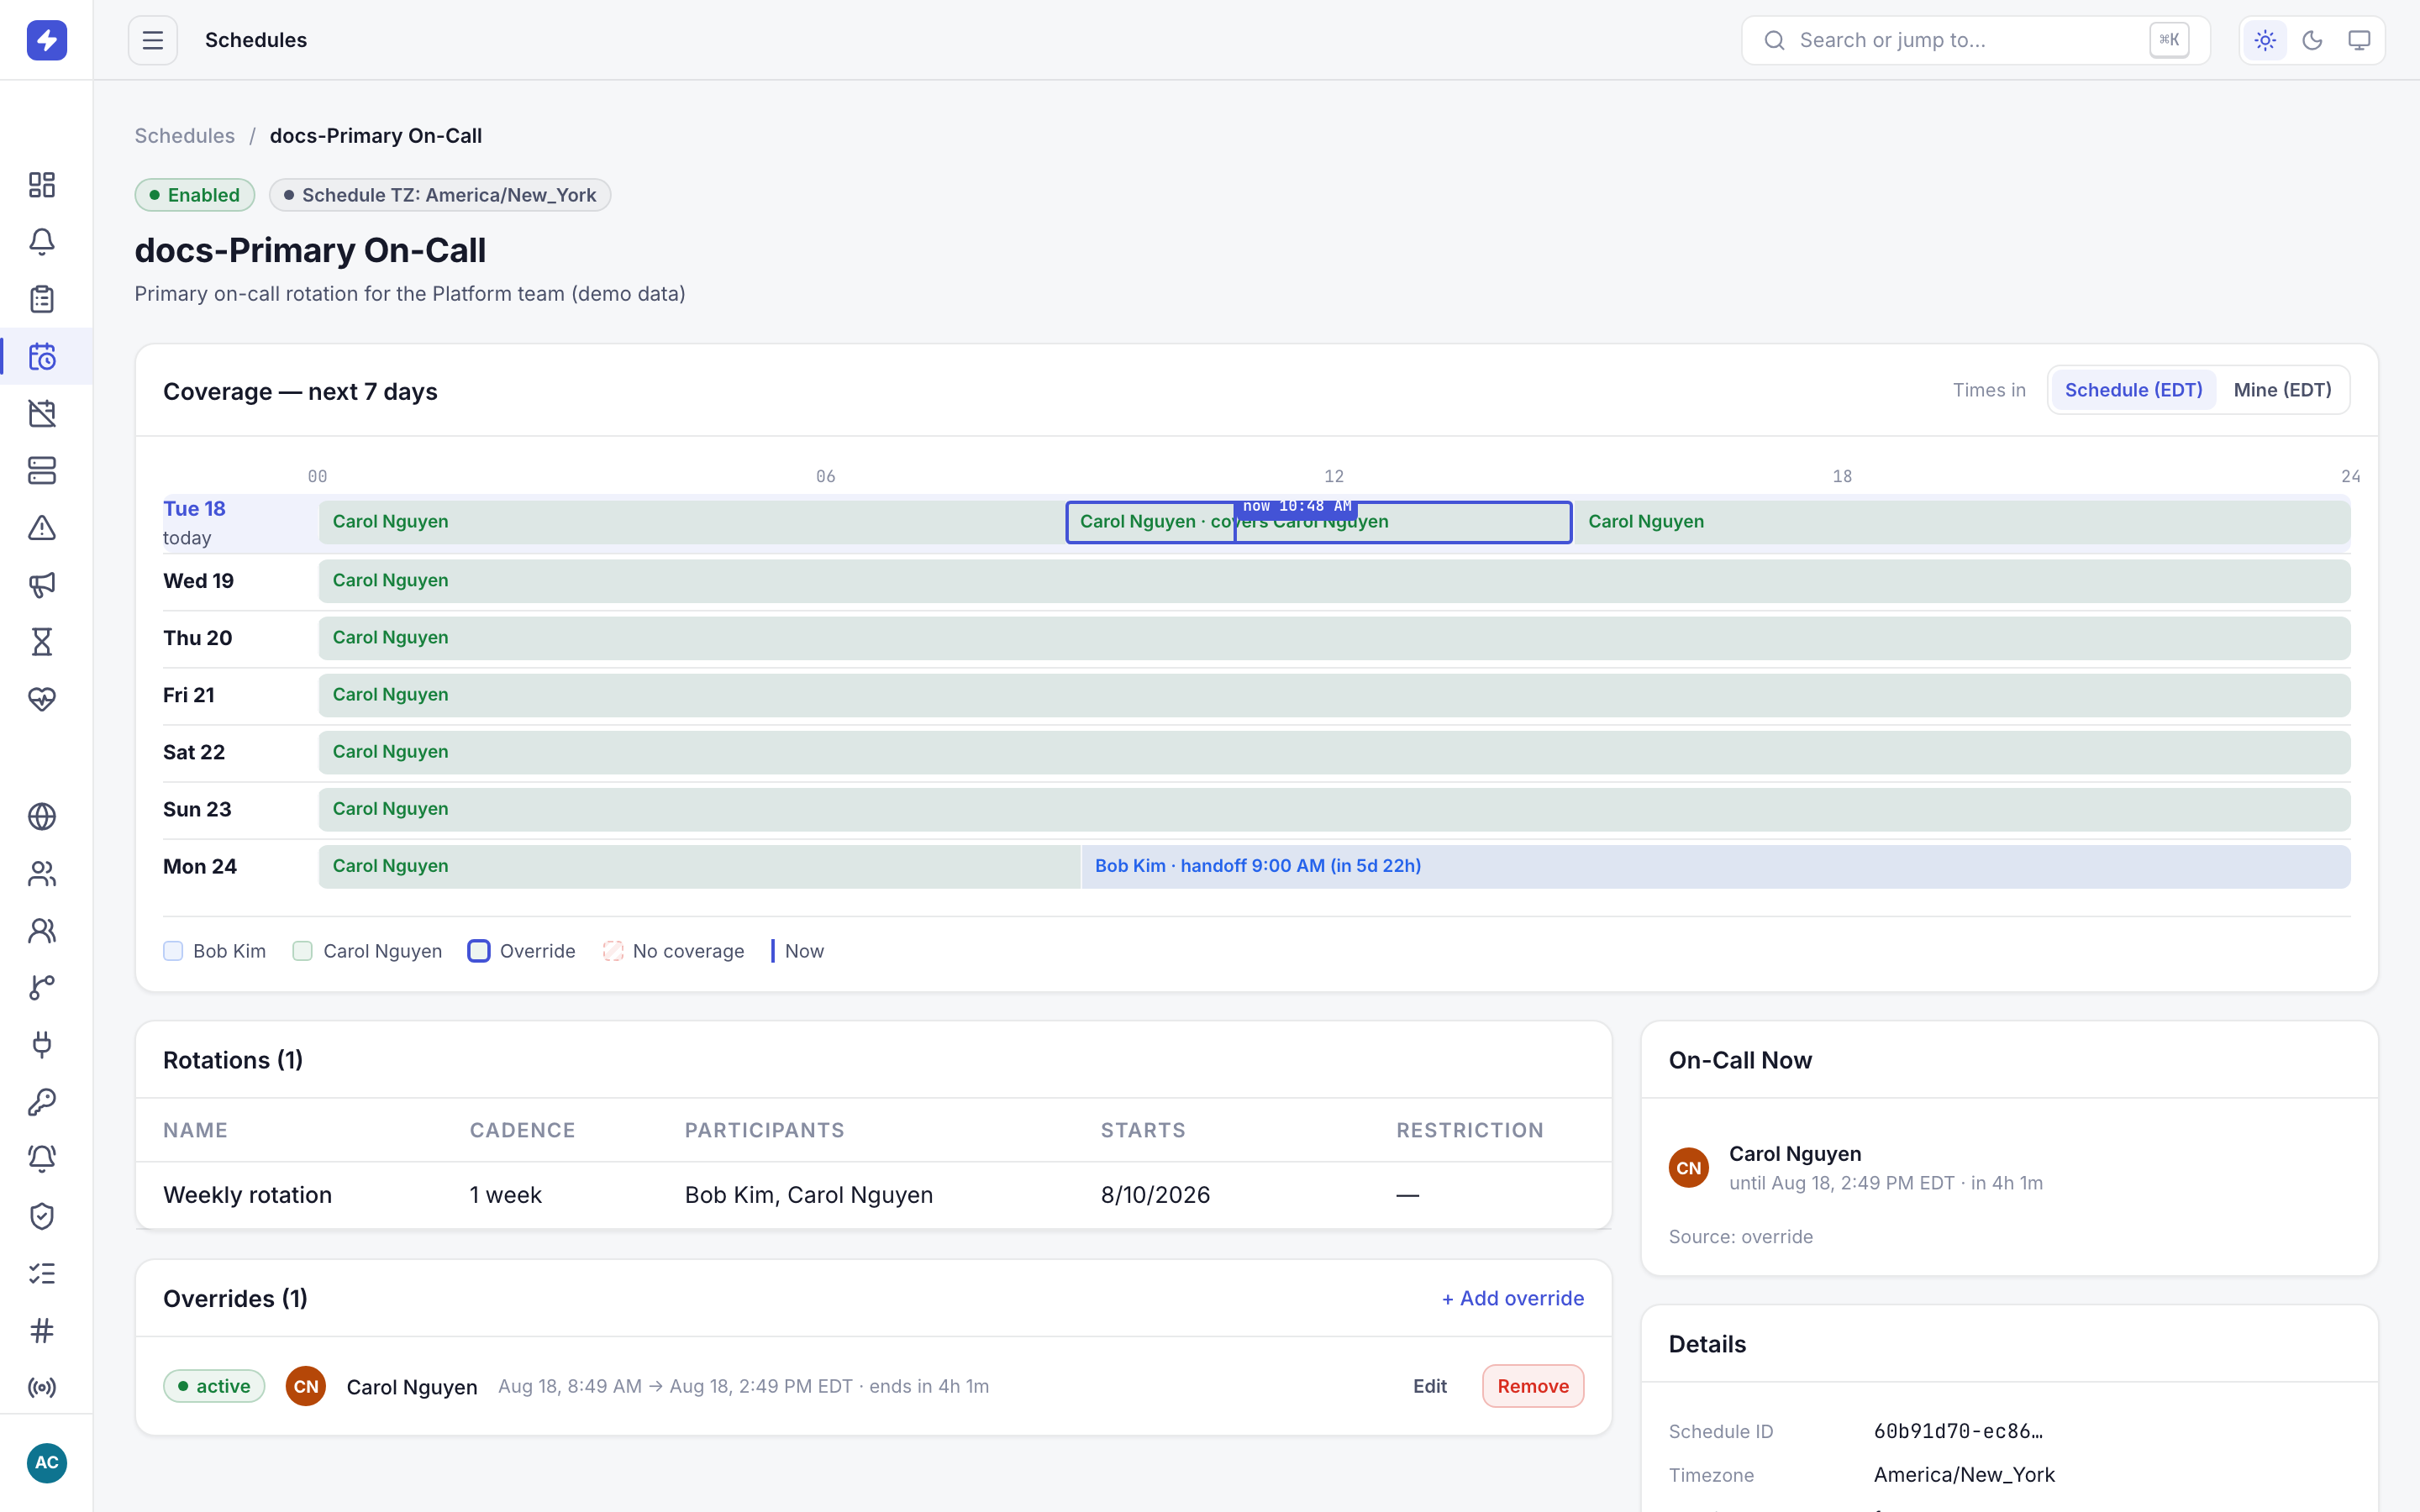
Schedule detail shows who is on call now (including whether an override is the source), up-next coverage, the rotation table, and overrides. -
Cover gaps with overrides
An override replaces the scheduled on-call for a fixed window — a dentist appointment, a half-day, a one-off swap. Create one from the schedule detail page: pick the covering user and the start/end times. Overrides always win over the rotation for their window, and the detail page says so explicitly when one is active.
If a new override overlaps an existing one, OpsPing doesn't silently stack them — it warns you and lists the conflicting windows before you confirm, so two people never both think they're covered (or worse, neither does).
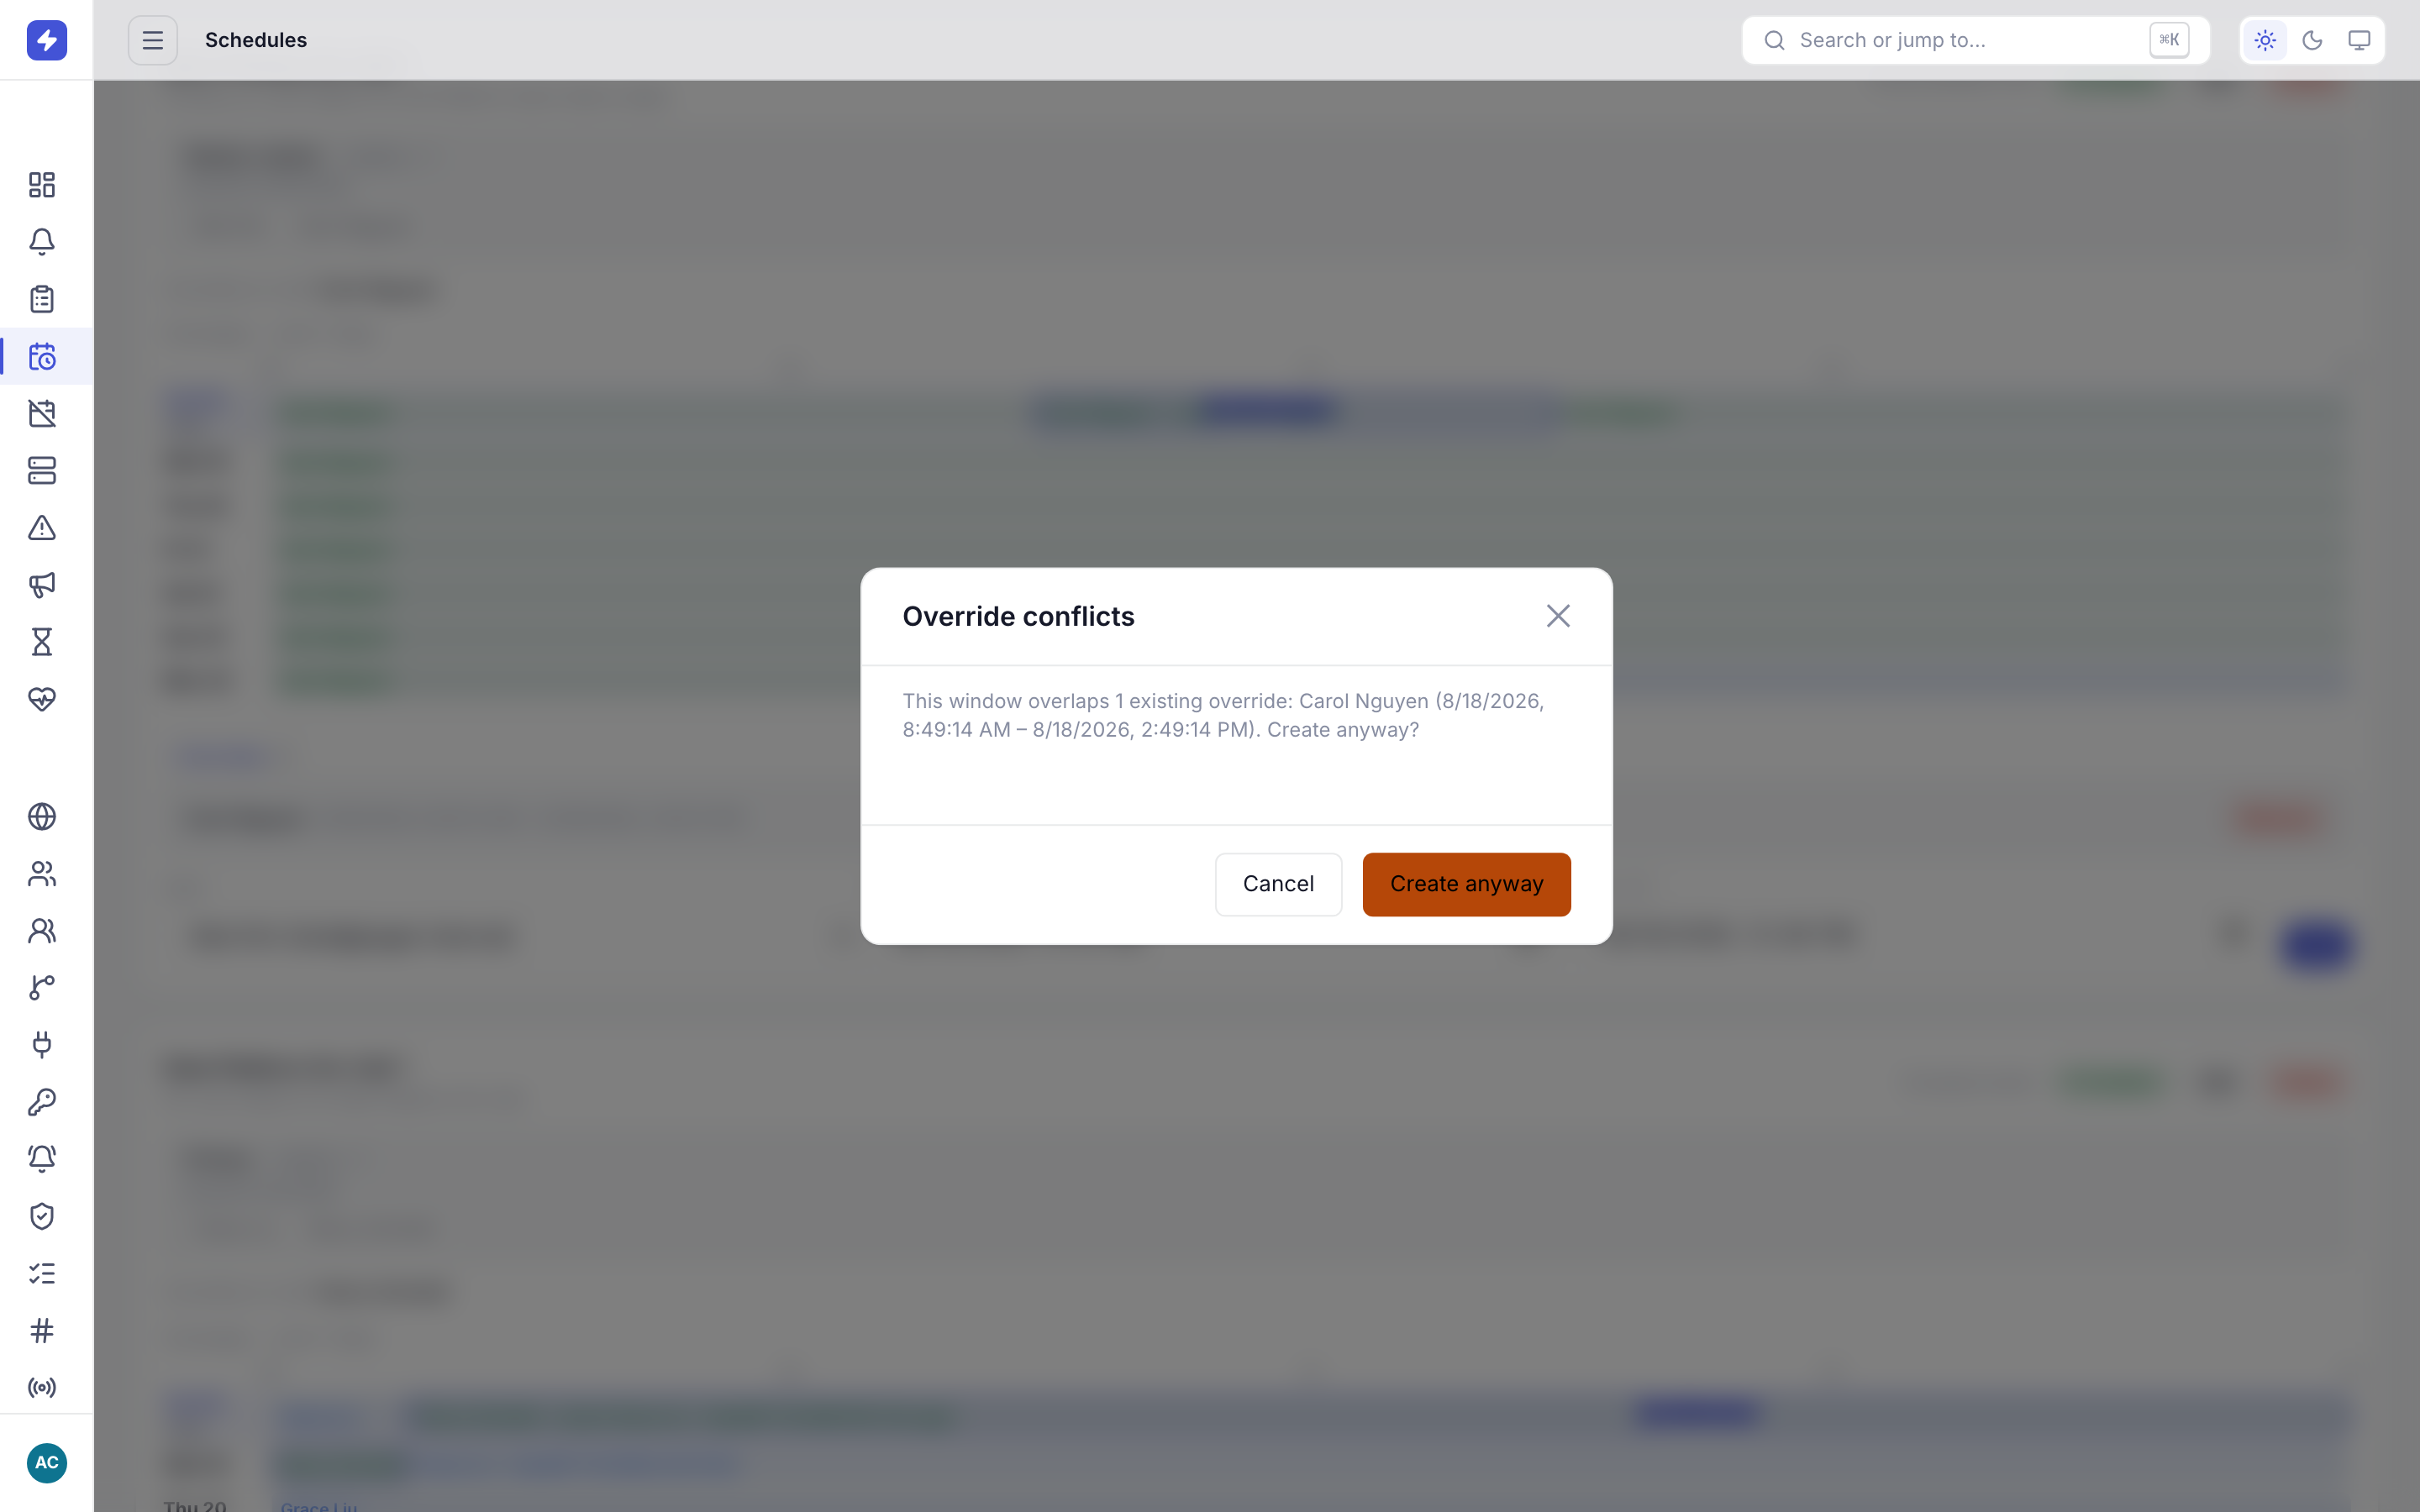
When a new override overlaps an existing one, OpsPing warns you and lists the conflicting windows before you confirm. -
Handle PTO with out-of-office requests
For planned absences, people request time off from the mobile app instead of asking an admin to hand-edit overrides. An out-of-office request covers a date range; pending requests can be cancelled, and once approved the rest of the rotation absorbs the coverage.
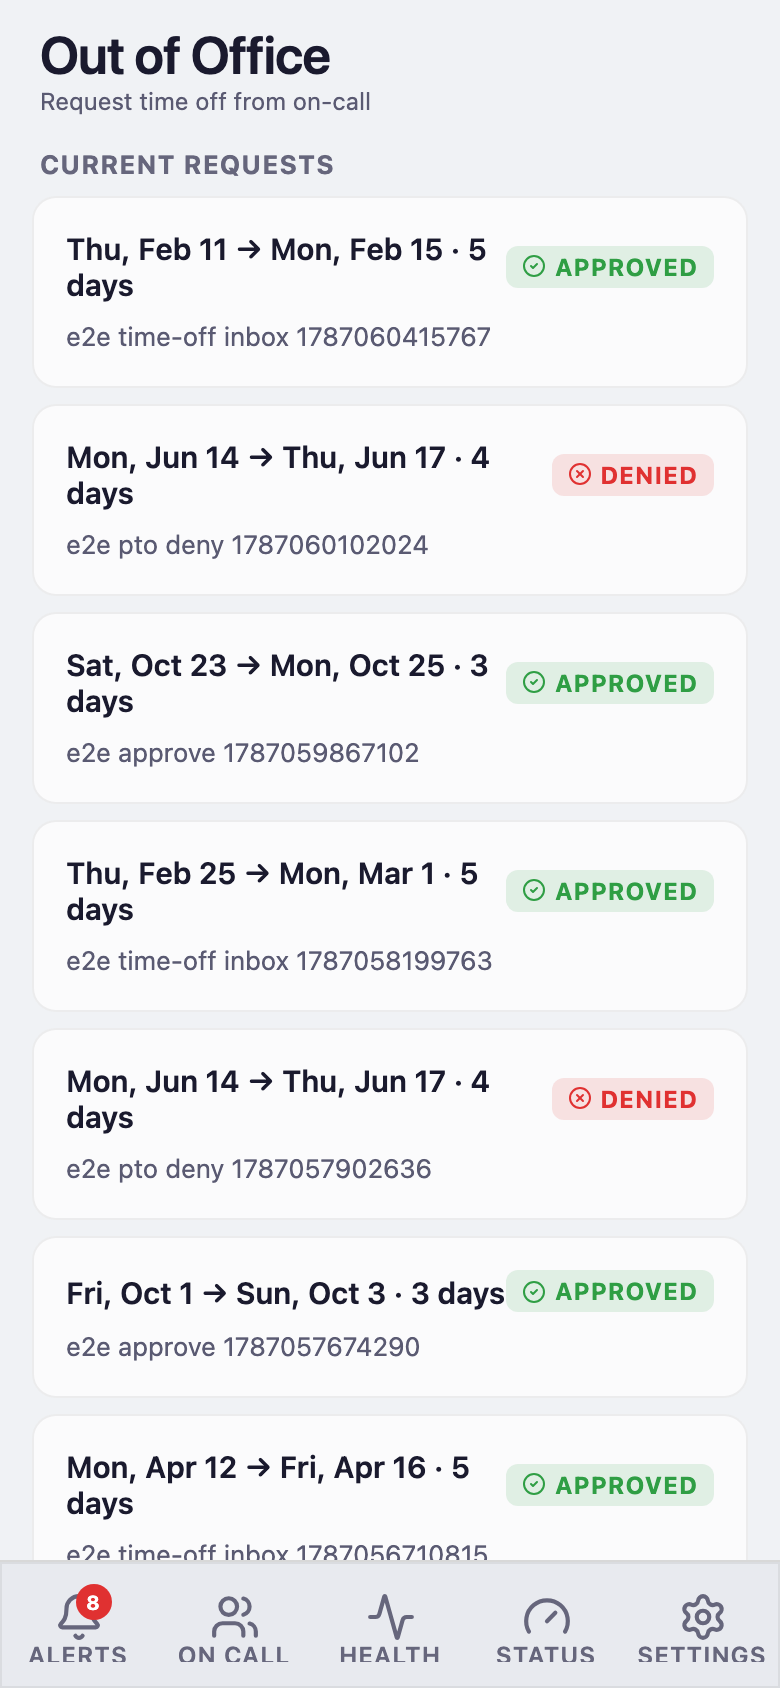
Request time off from on-call. Pending requests can be cancelled; approved requests hand coverage to the rest of the rotation. -
Approve or deny out-of-office requests
That covers the request side — the person asking for time off. Approval is an admin action. Pending requests appear on the Teams page, grouped per team, each with the requester, the date range, and the reason. Click Approve to hand coverage to the rest of the rotation, or Deny to leave the schedule unchanged.
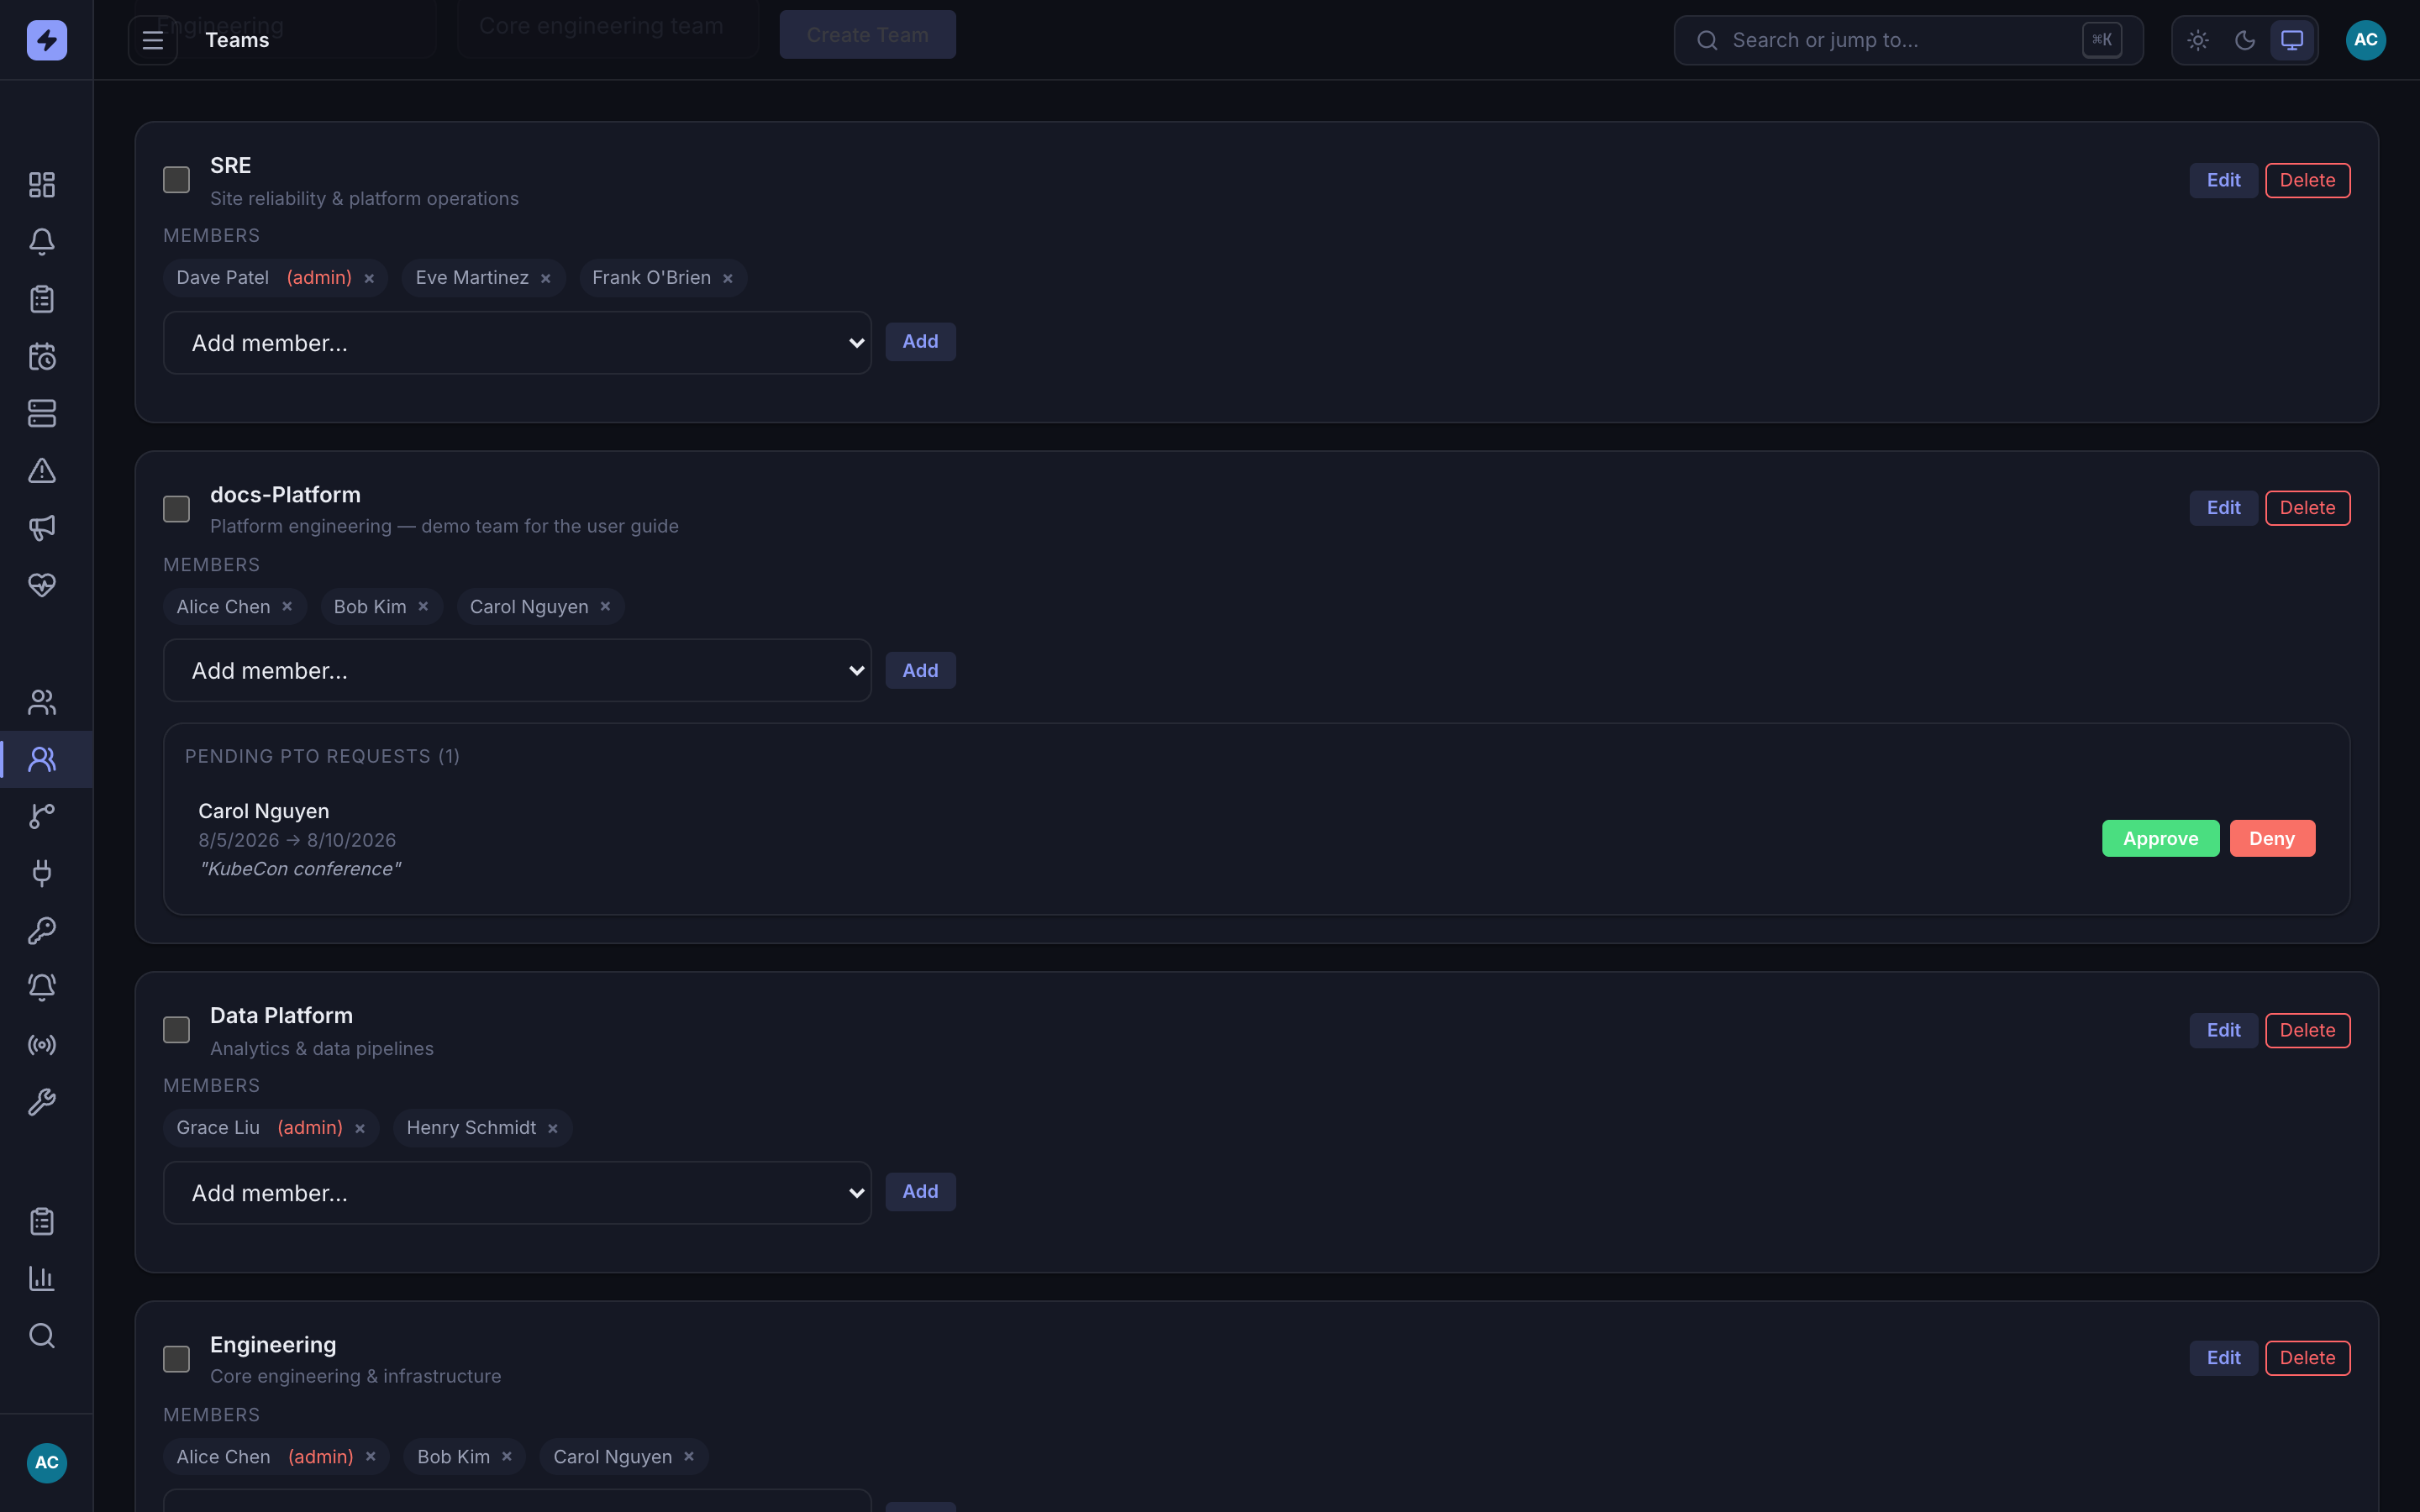
A pending request on the Teams page with the requester, dates, and reason. Approve reassigns coverage to the rest of the rotation; Deny keeps the requester on their shifts. TipApproving doesn't ask you to pick a coverer — the rotation's remaining members absorb the requester's shifts automatically. If you need a specific person to cover instead, deny the request and add an override yourself.
-
Check who's on call from your phone
The mobile On-call tab shows a 24-hour timeline card per schedule — who is covering right now and until when. Tap a schedule for the detail view: the next seven days of shifts plus the overrides section, where you can tap a shift to request an override yourself.
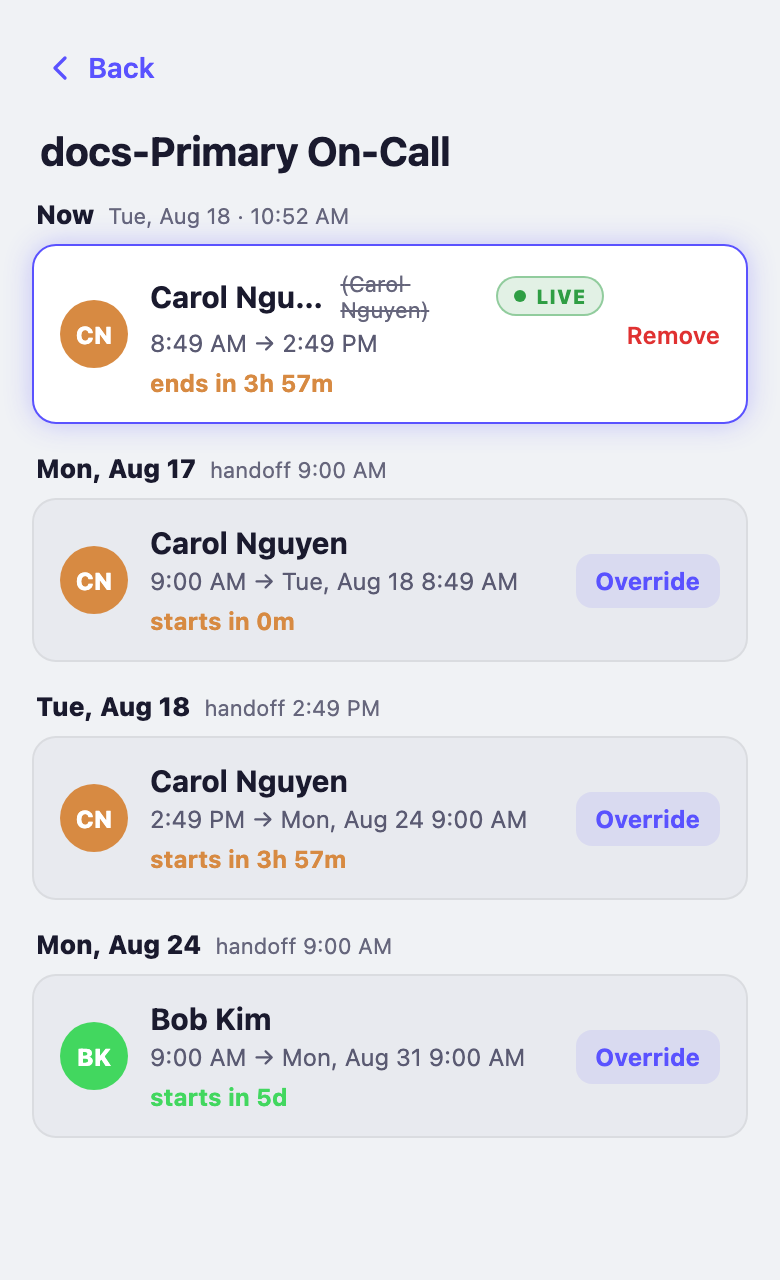
Schedule detail: the live shift (LIVE card) plus the coming days of shifts, grouped by day. 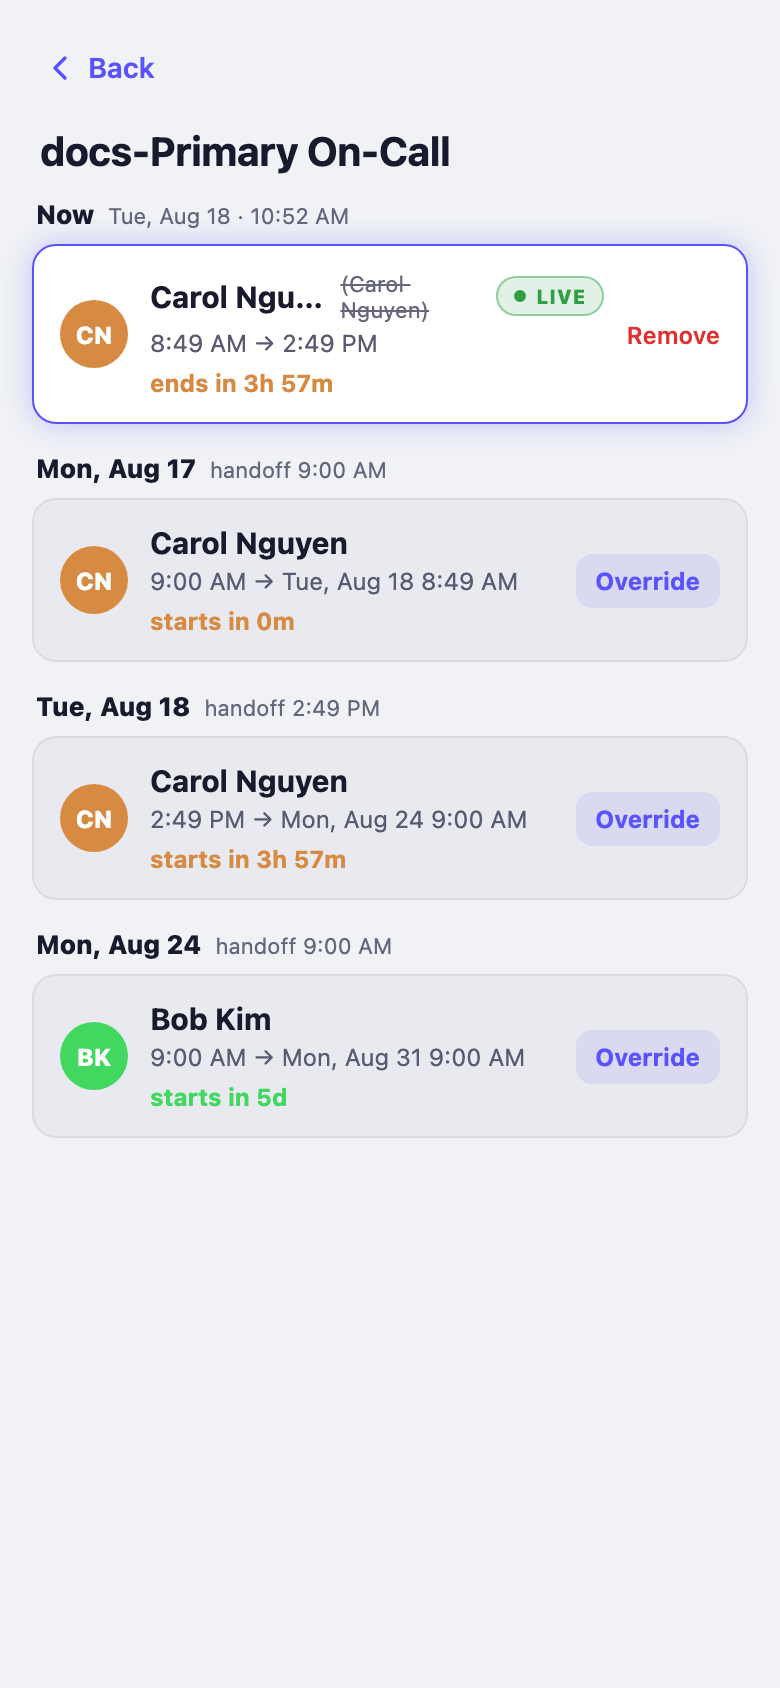
Mobile schedule detail: upcoming shifts for the next seven days and the overrides section. Tap a shift to request an override. -
Build an escalation policy
Schedules pick the first person; escalation policies pick everyone after that. Go to Escalations and create a policy. Rules run top to bottom: each rule has a delay in minutes and a recipient — a user, a schedule (whoever is on call), or a whole team. The workhorse setup is two rules: notify the on-call schedule immediately, then notify the team lead after 10 minutes.
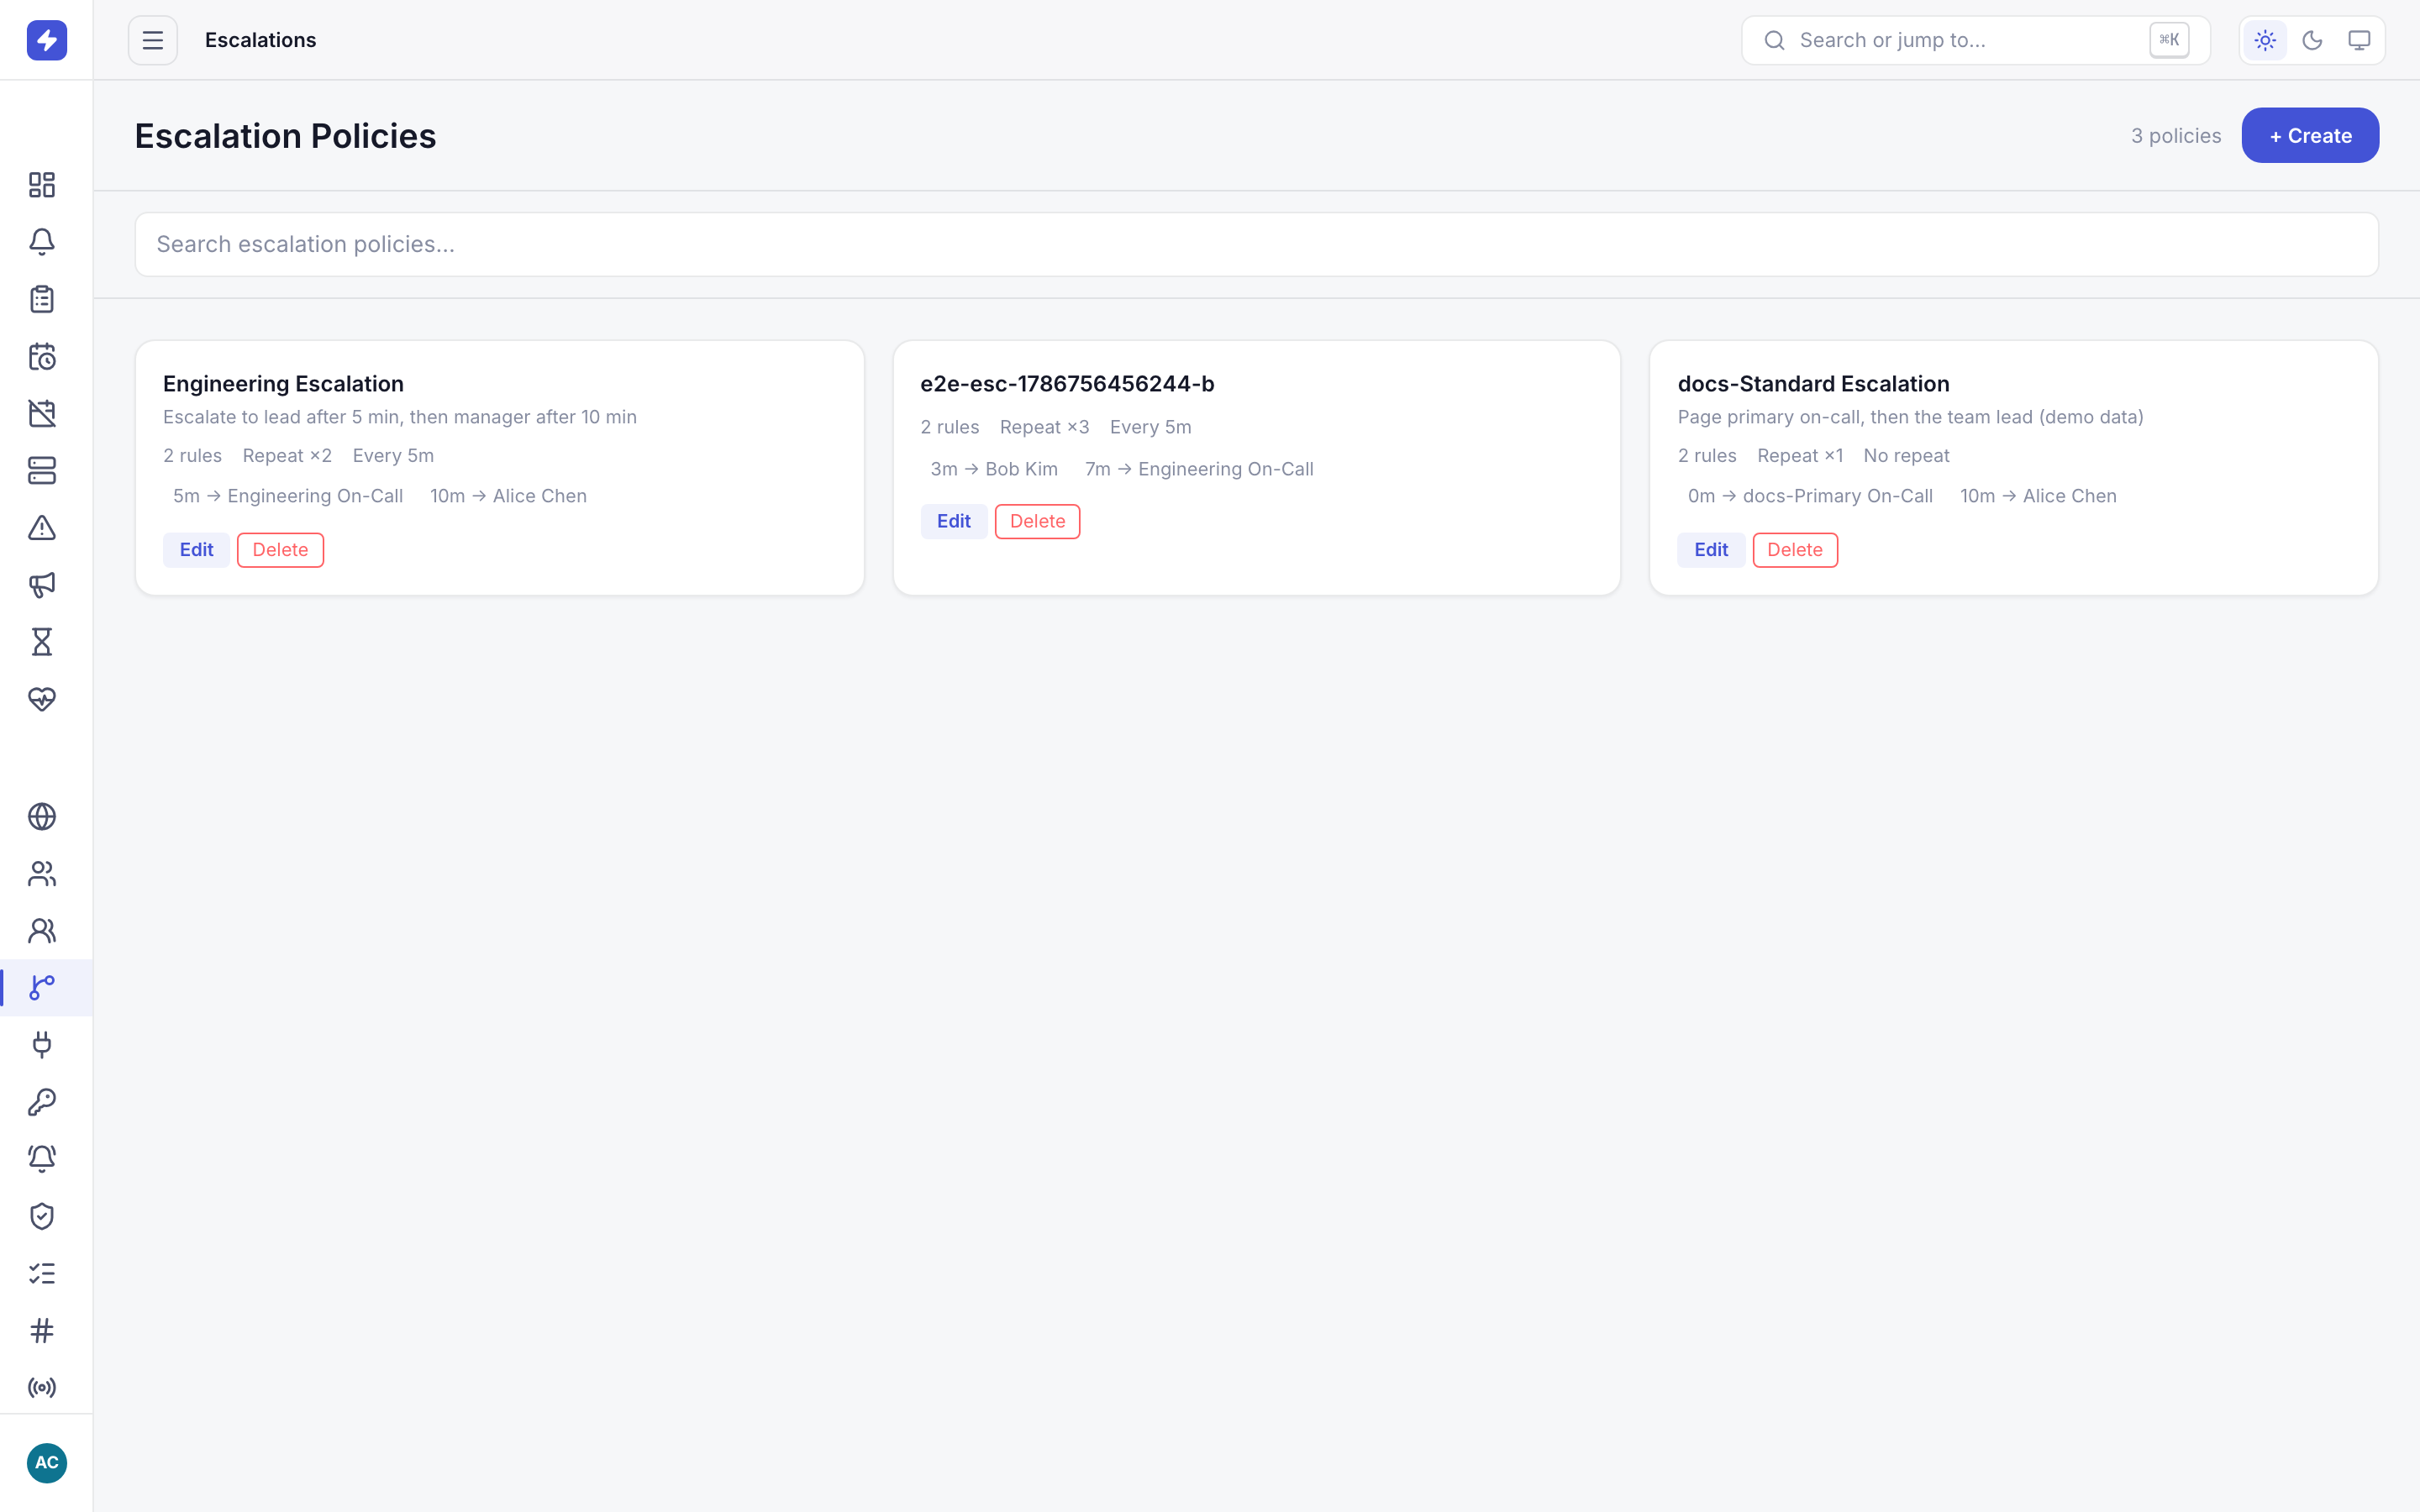
Escalation policies define who gets notified, in what order, and with what delay when an alert is not acknowledged. In the editor, drag rules to reorder them — order is the entire semantics, so the fastest responder belongs at the top. An optional repeat setting restarts the chain if the alert is still unacknowledged after the last rule runs.
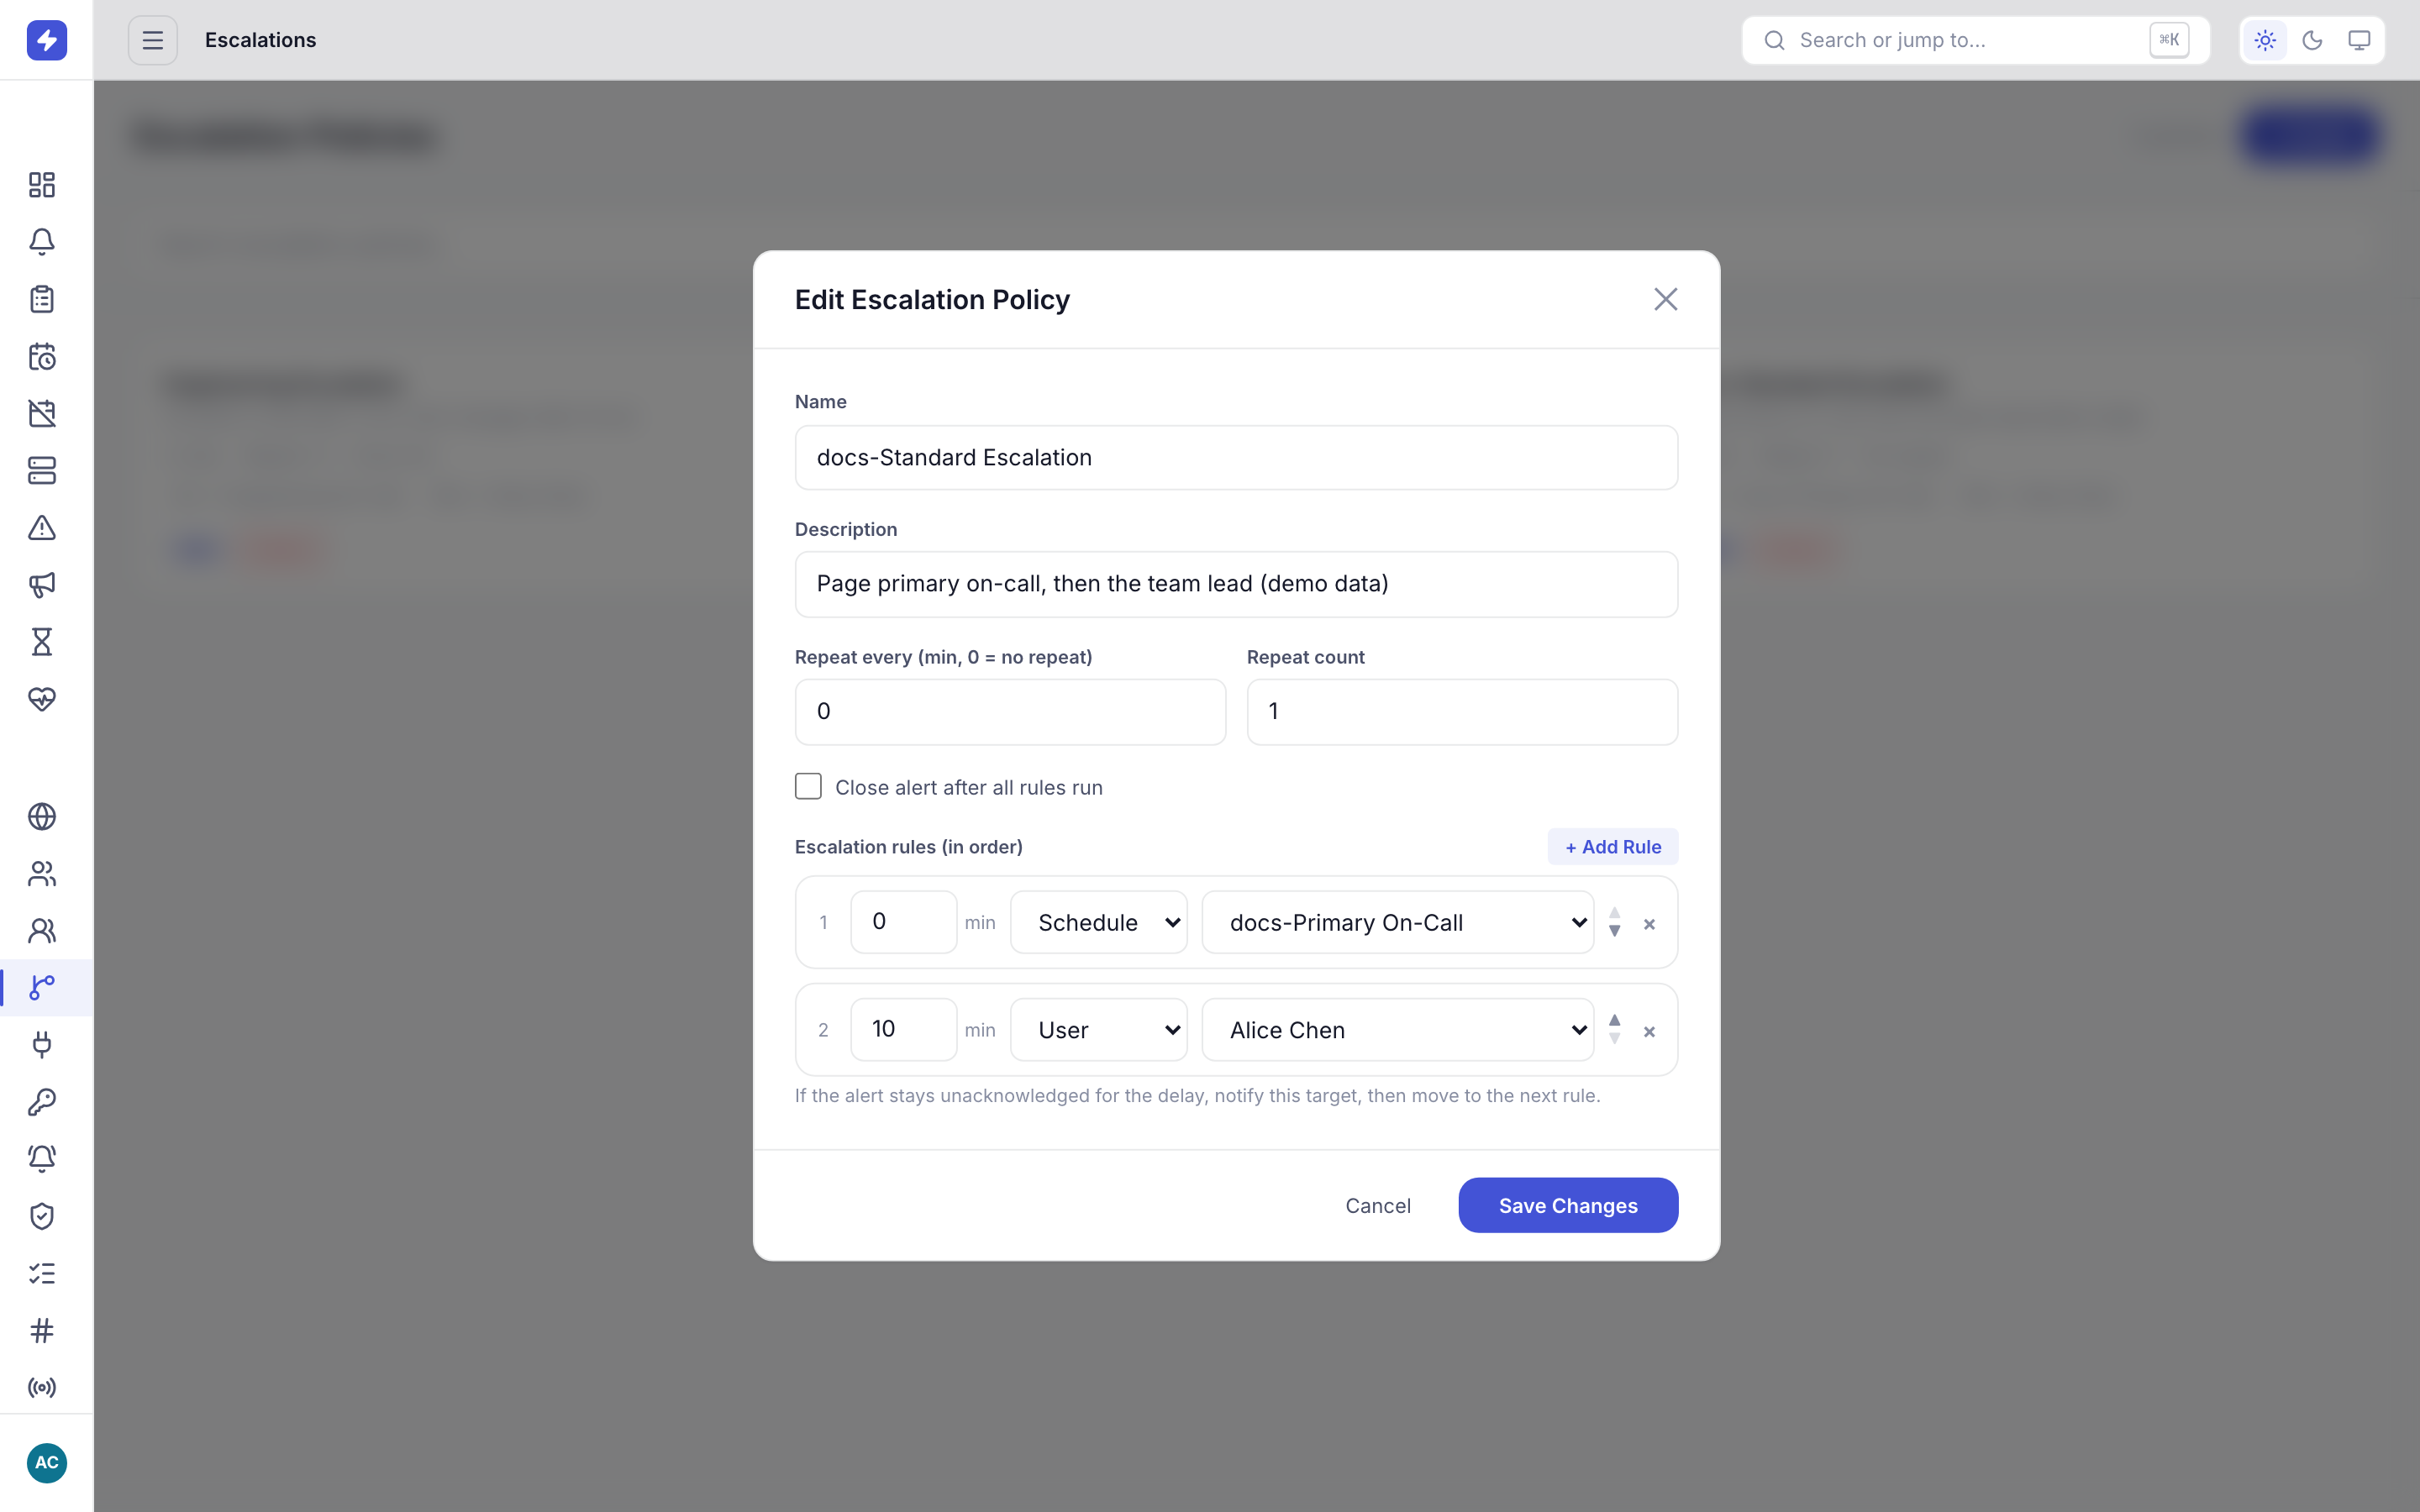
The escalation policy editor: rules run top to bottom; each rule has a delay in minutes and a recipient (user, schedule, or team). NoteEscalation stops the moment the alert is acknowledged or closed — ack is what halts the chain. Snoozing does not count as acknowledgement: a snoozed alert keeps its escalation state and reopens when the snooze window ends. If you snooze an alert nobody has acked, the chain can still fire.