Teams & Administration
The admin surface of OpsPing: who's in the workspace, what they can touch, which tools can push alerts in, and the records that prove what happened. Everything in this guide assumes the admin role unless noted.
- An account with the admin role.
- The core product running: alerts, schedules, and channels per the earlier guides.
-
Group people into teams
Teams group users for schedules, escalation policies, and access scoping. Create one per on-call group — Platform, Payments, Support — and add members. A user can belong to more than one team, and teams are the unit schedules and escalation rules most often target.
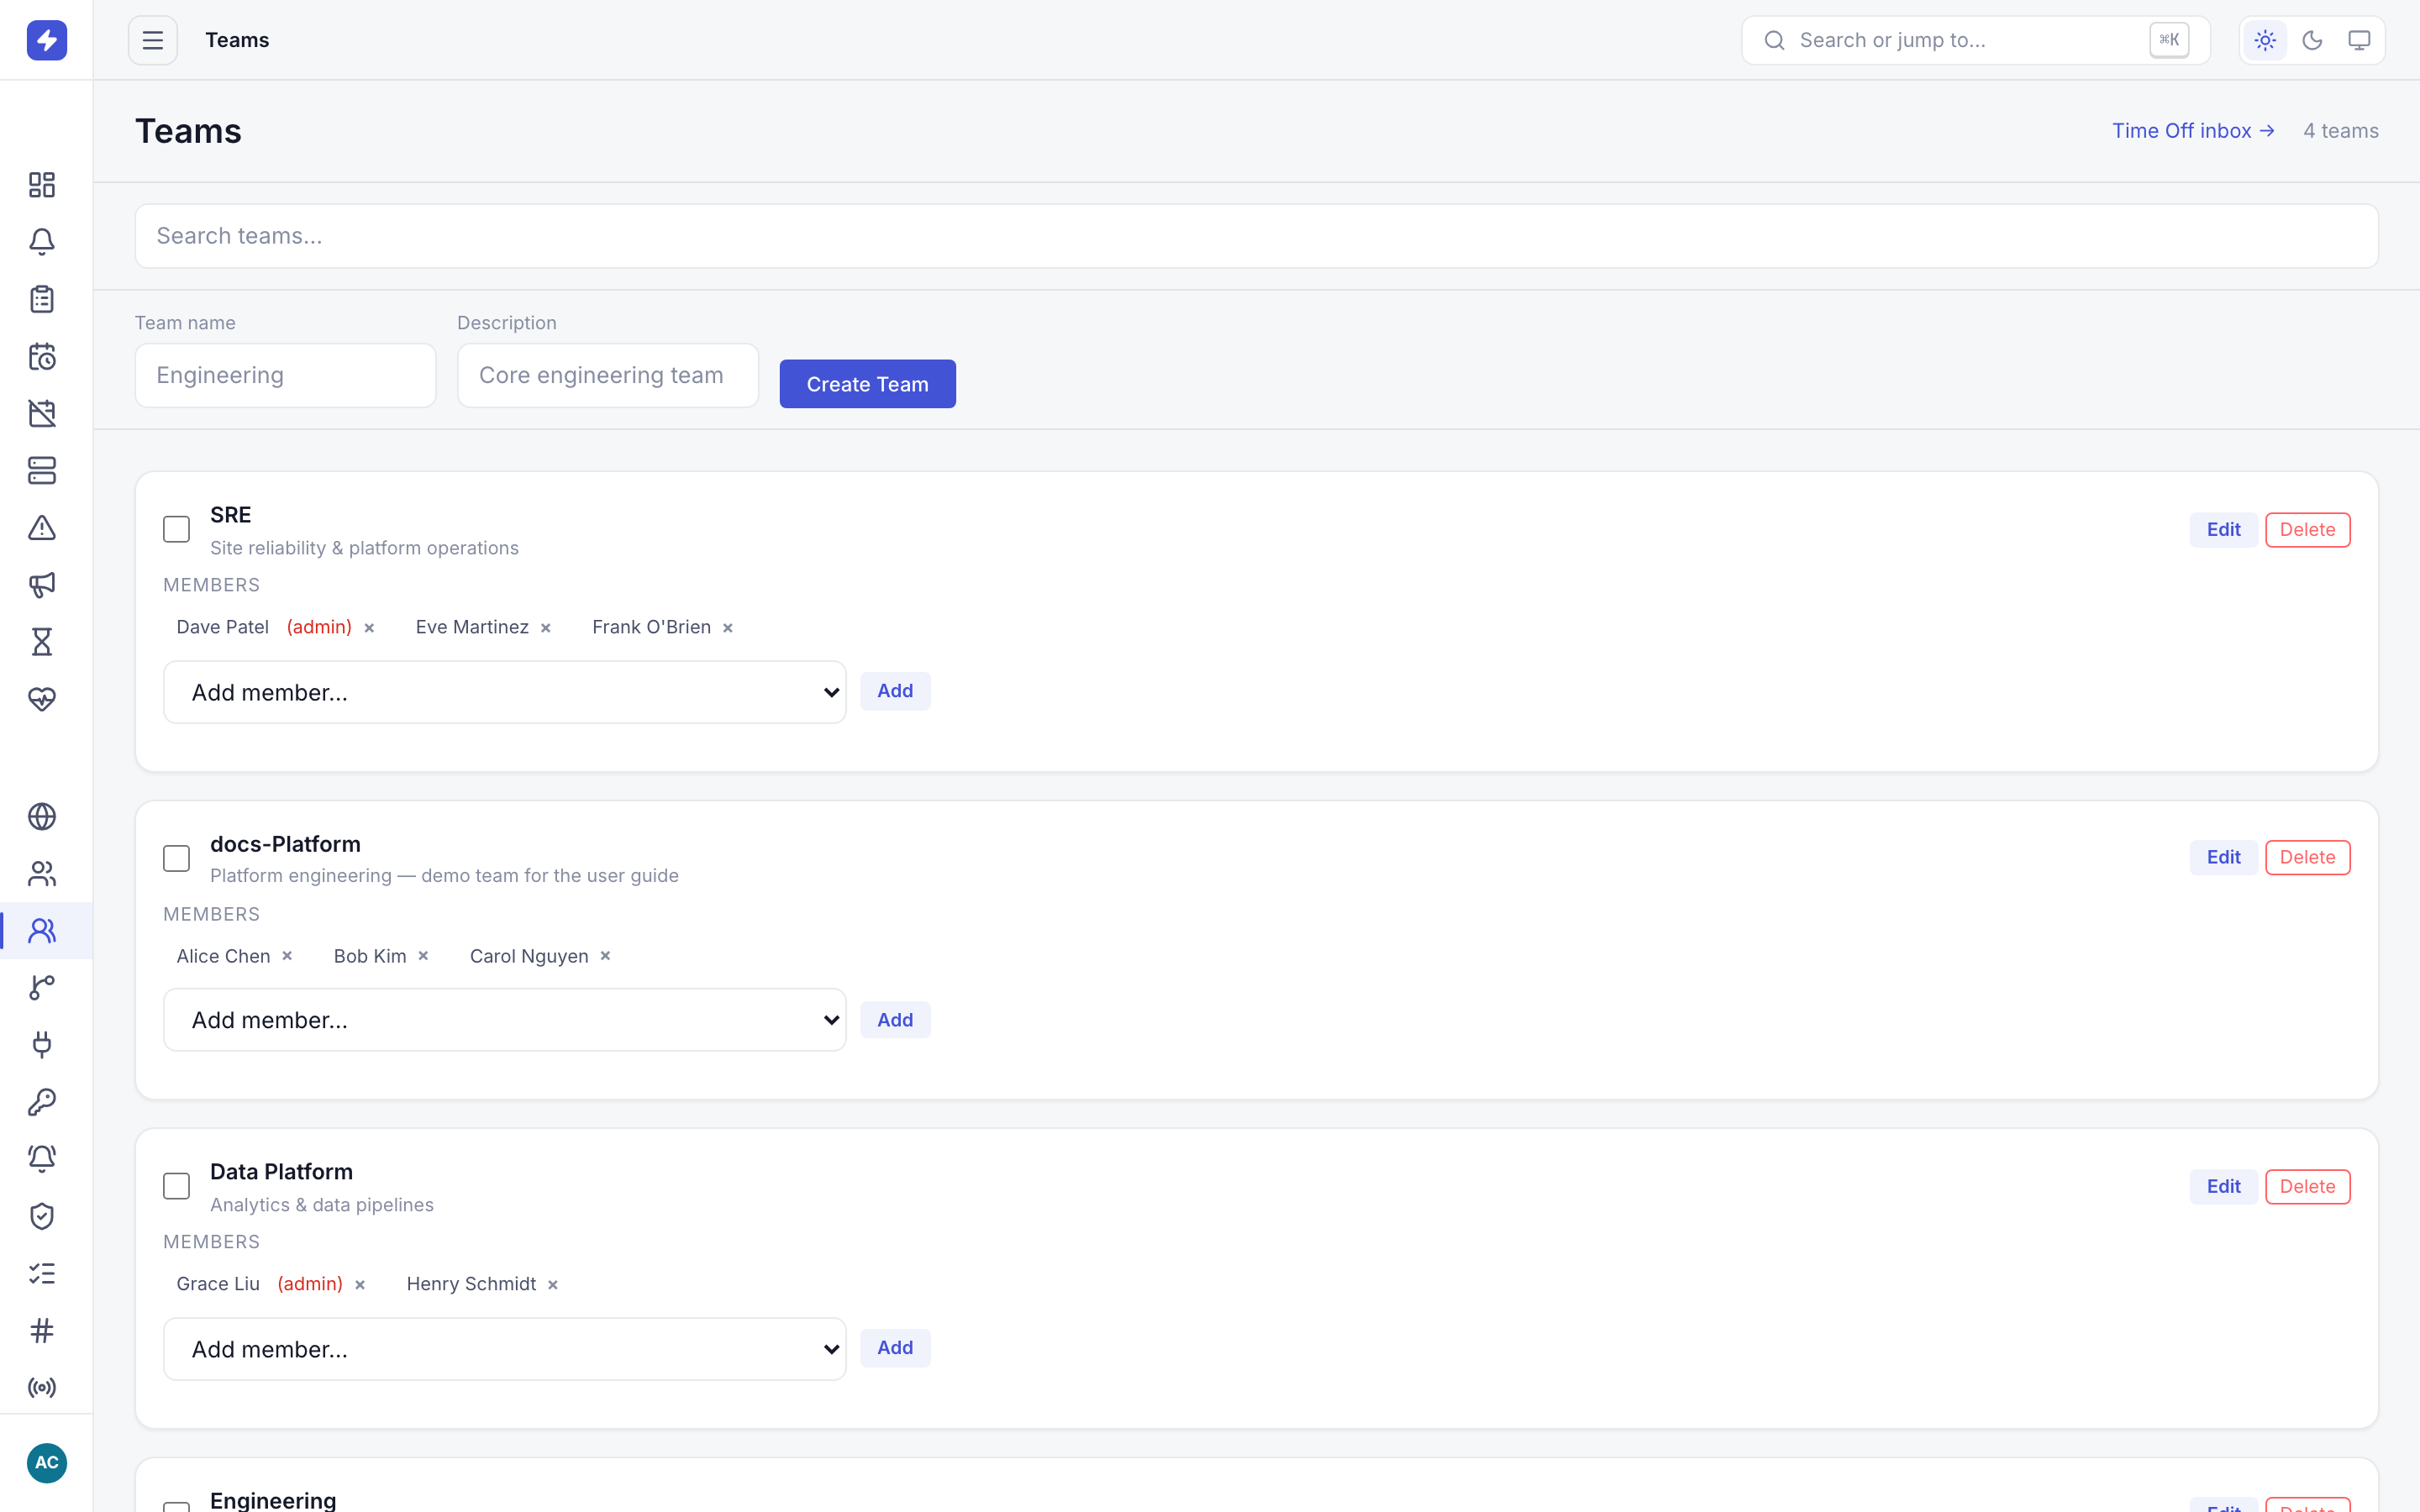
Teams group users for schedules, escalation policies, and access scoping. The docs-Platform team here contains three members. -
Add users and send invites
The Users page lists everyone with their role, plus shortcuts to their notification setup and account controls. Admins can add a user inline — name, email, temporary password — or send an invite by email and let the person set their own password on first sign-in. Inline-added users start in the user role; change it afterwards with the Role action.
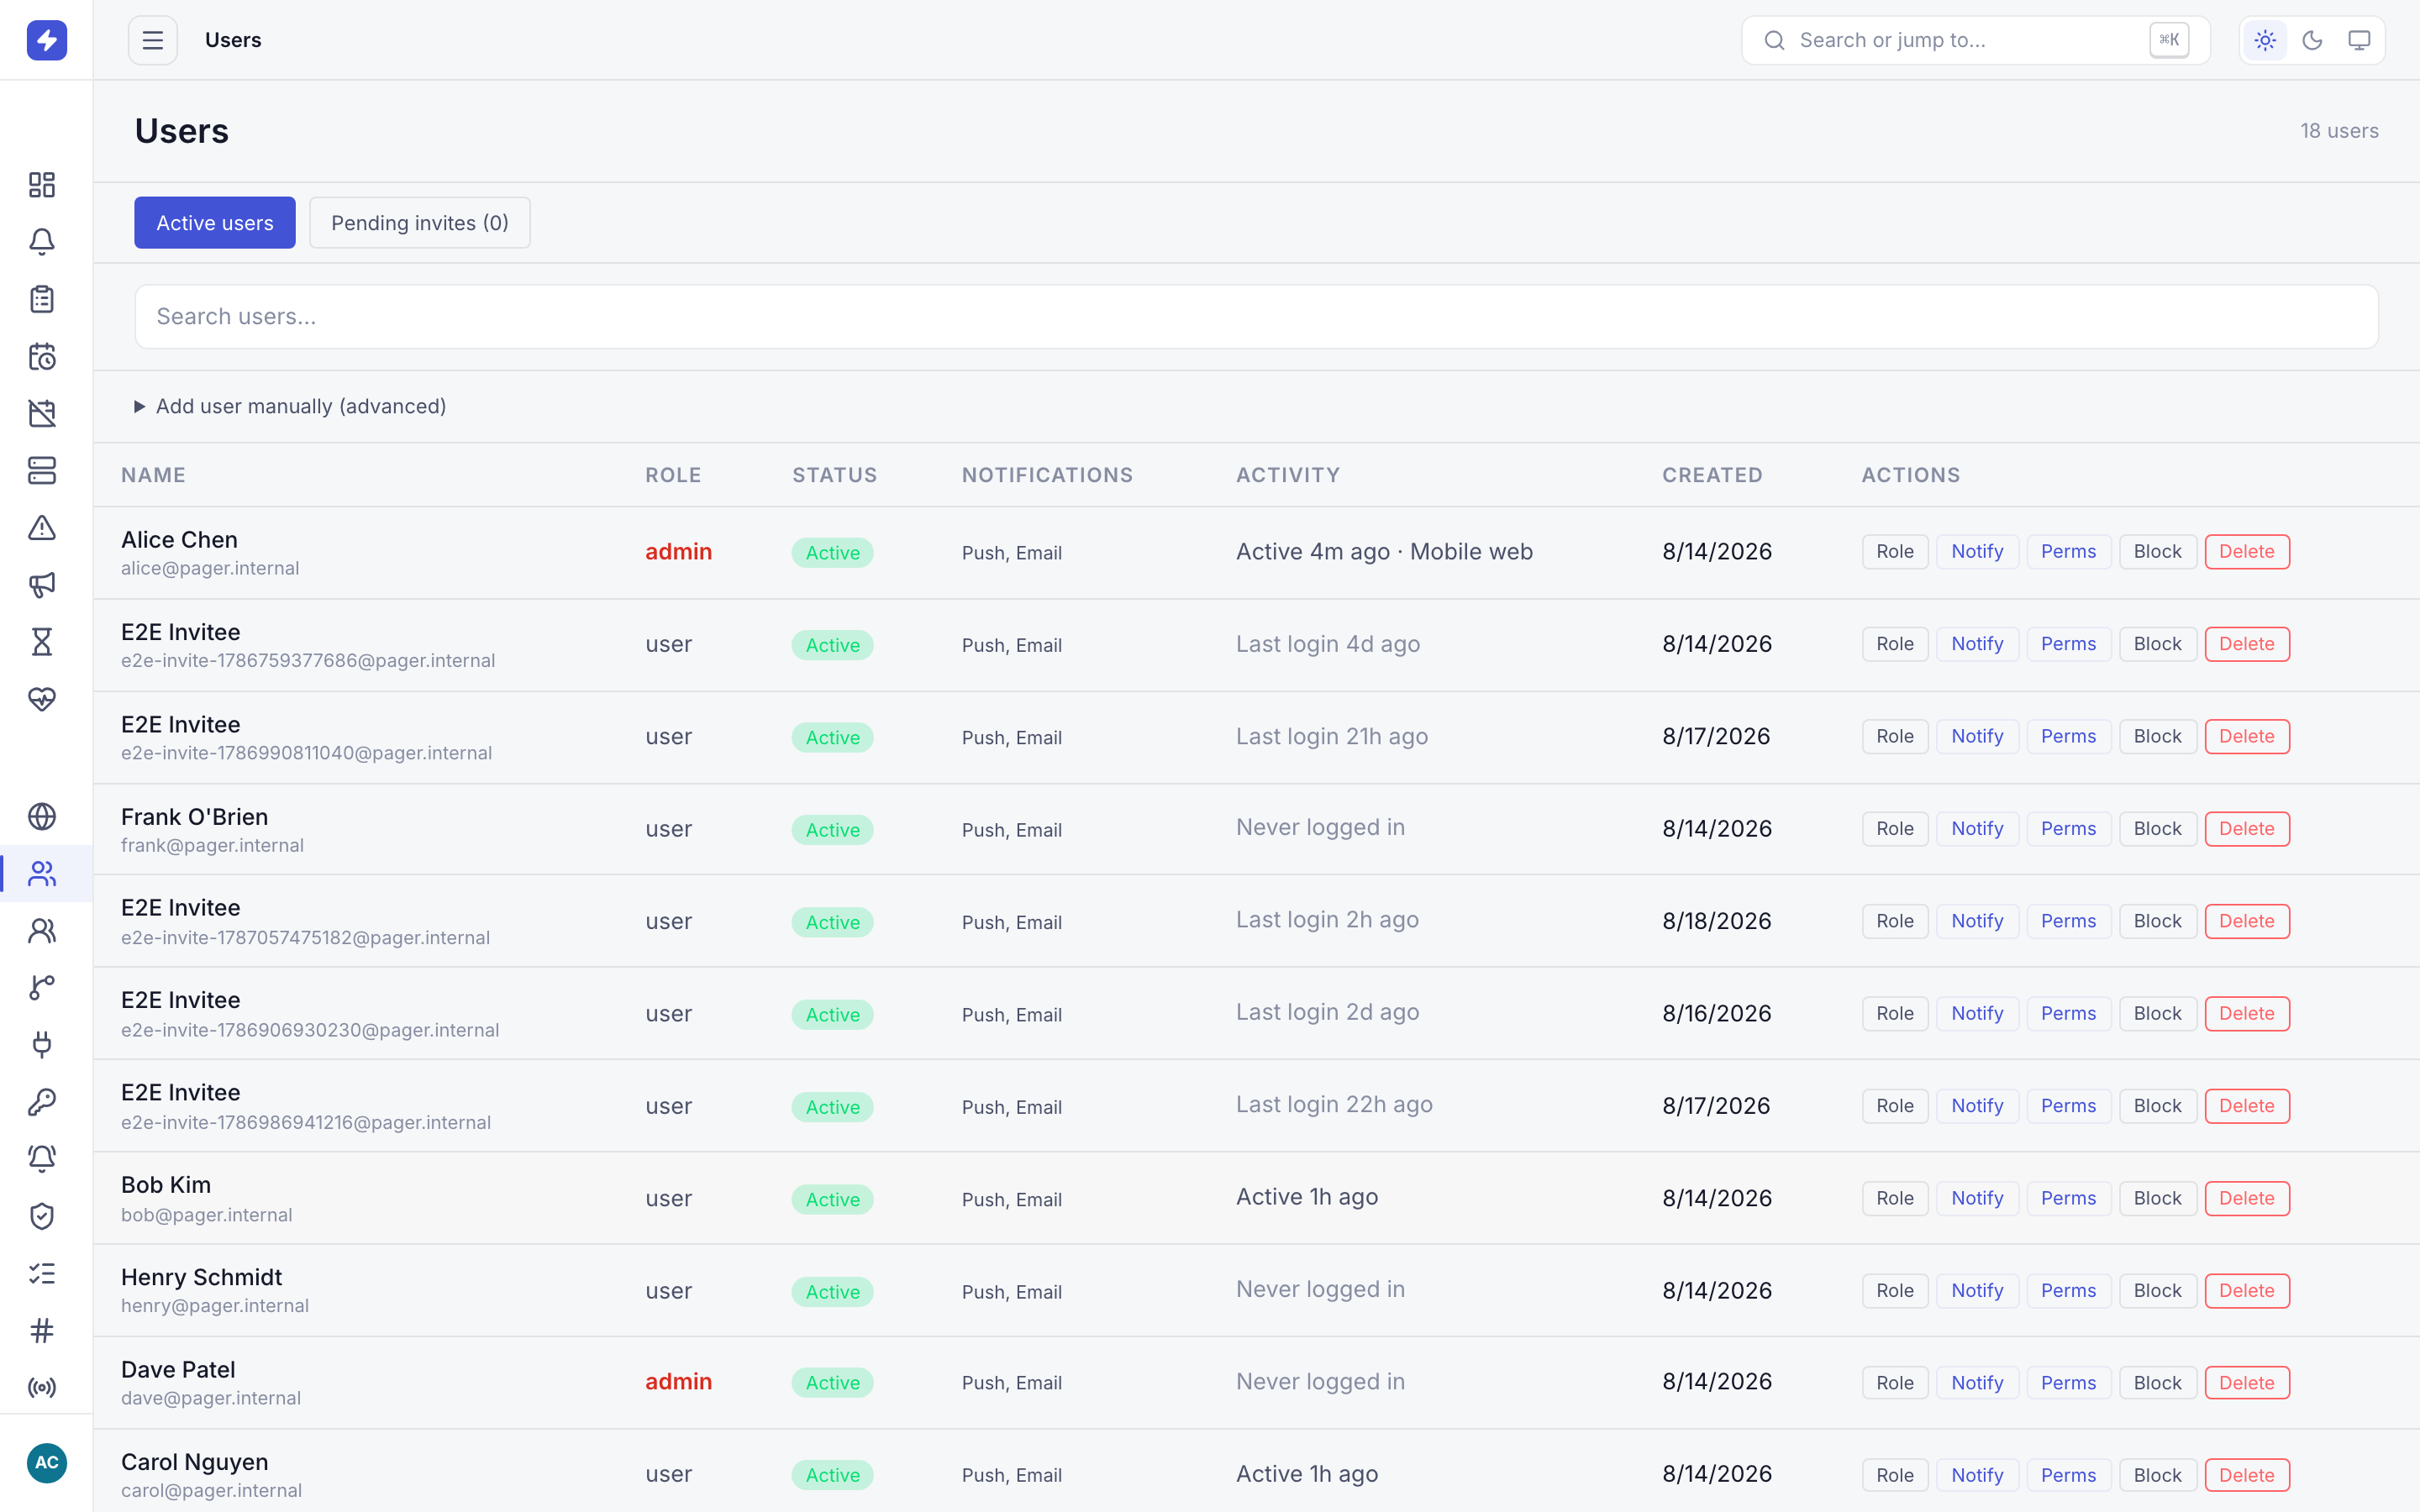
The users list with roles, notification shortcuts, and account controls. Admins can add users inline or send invites. Click a user for the detail page: profile, notification preferences, team memberships, on-call schedules, channels, and notification rules in one place — the single stop for "why isn't this person getting paged?"
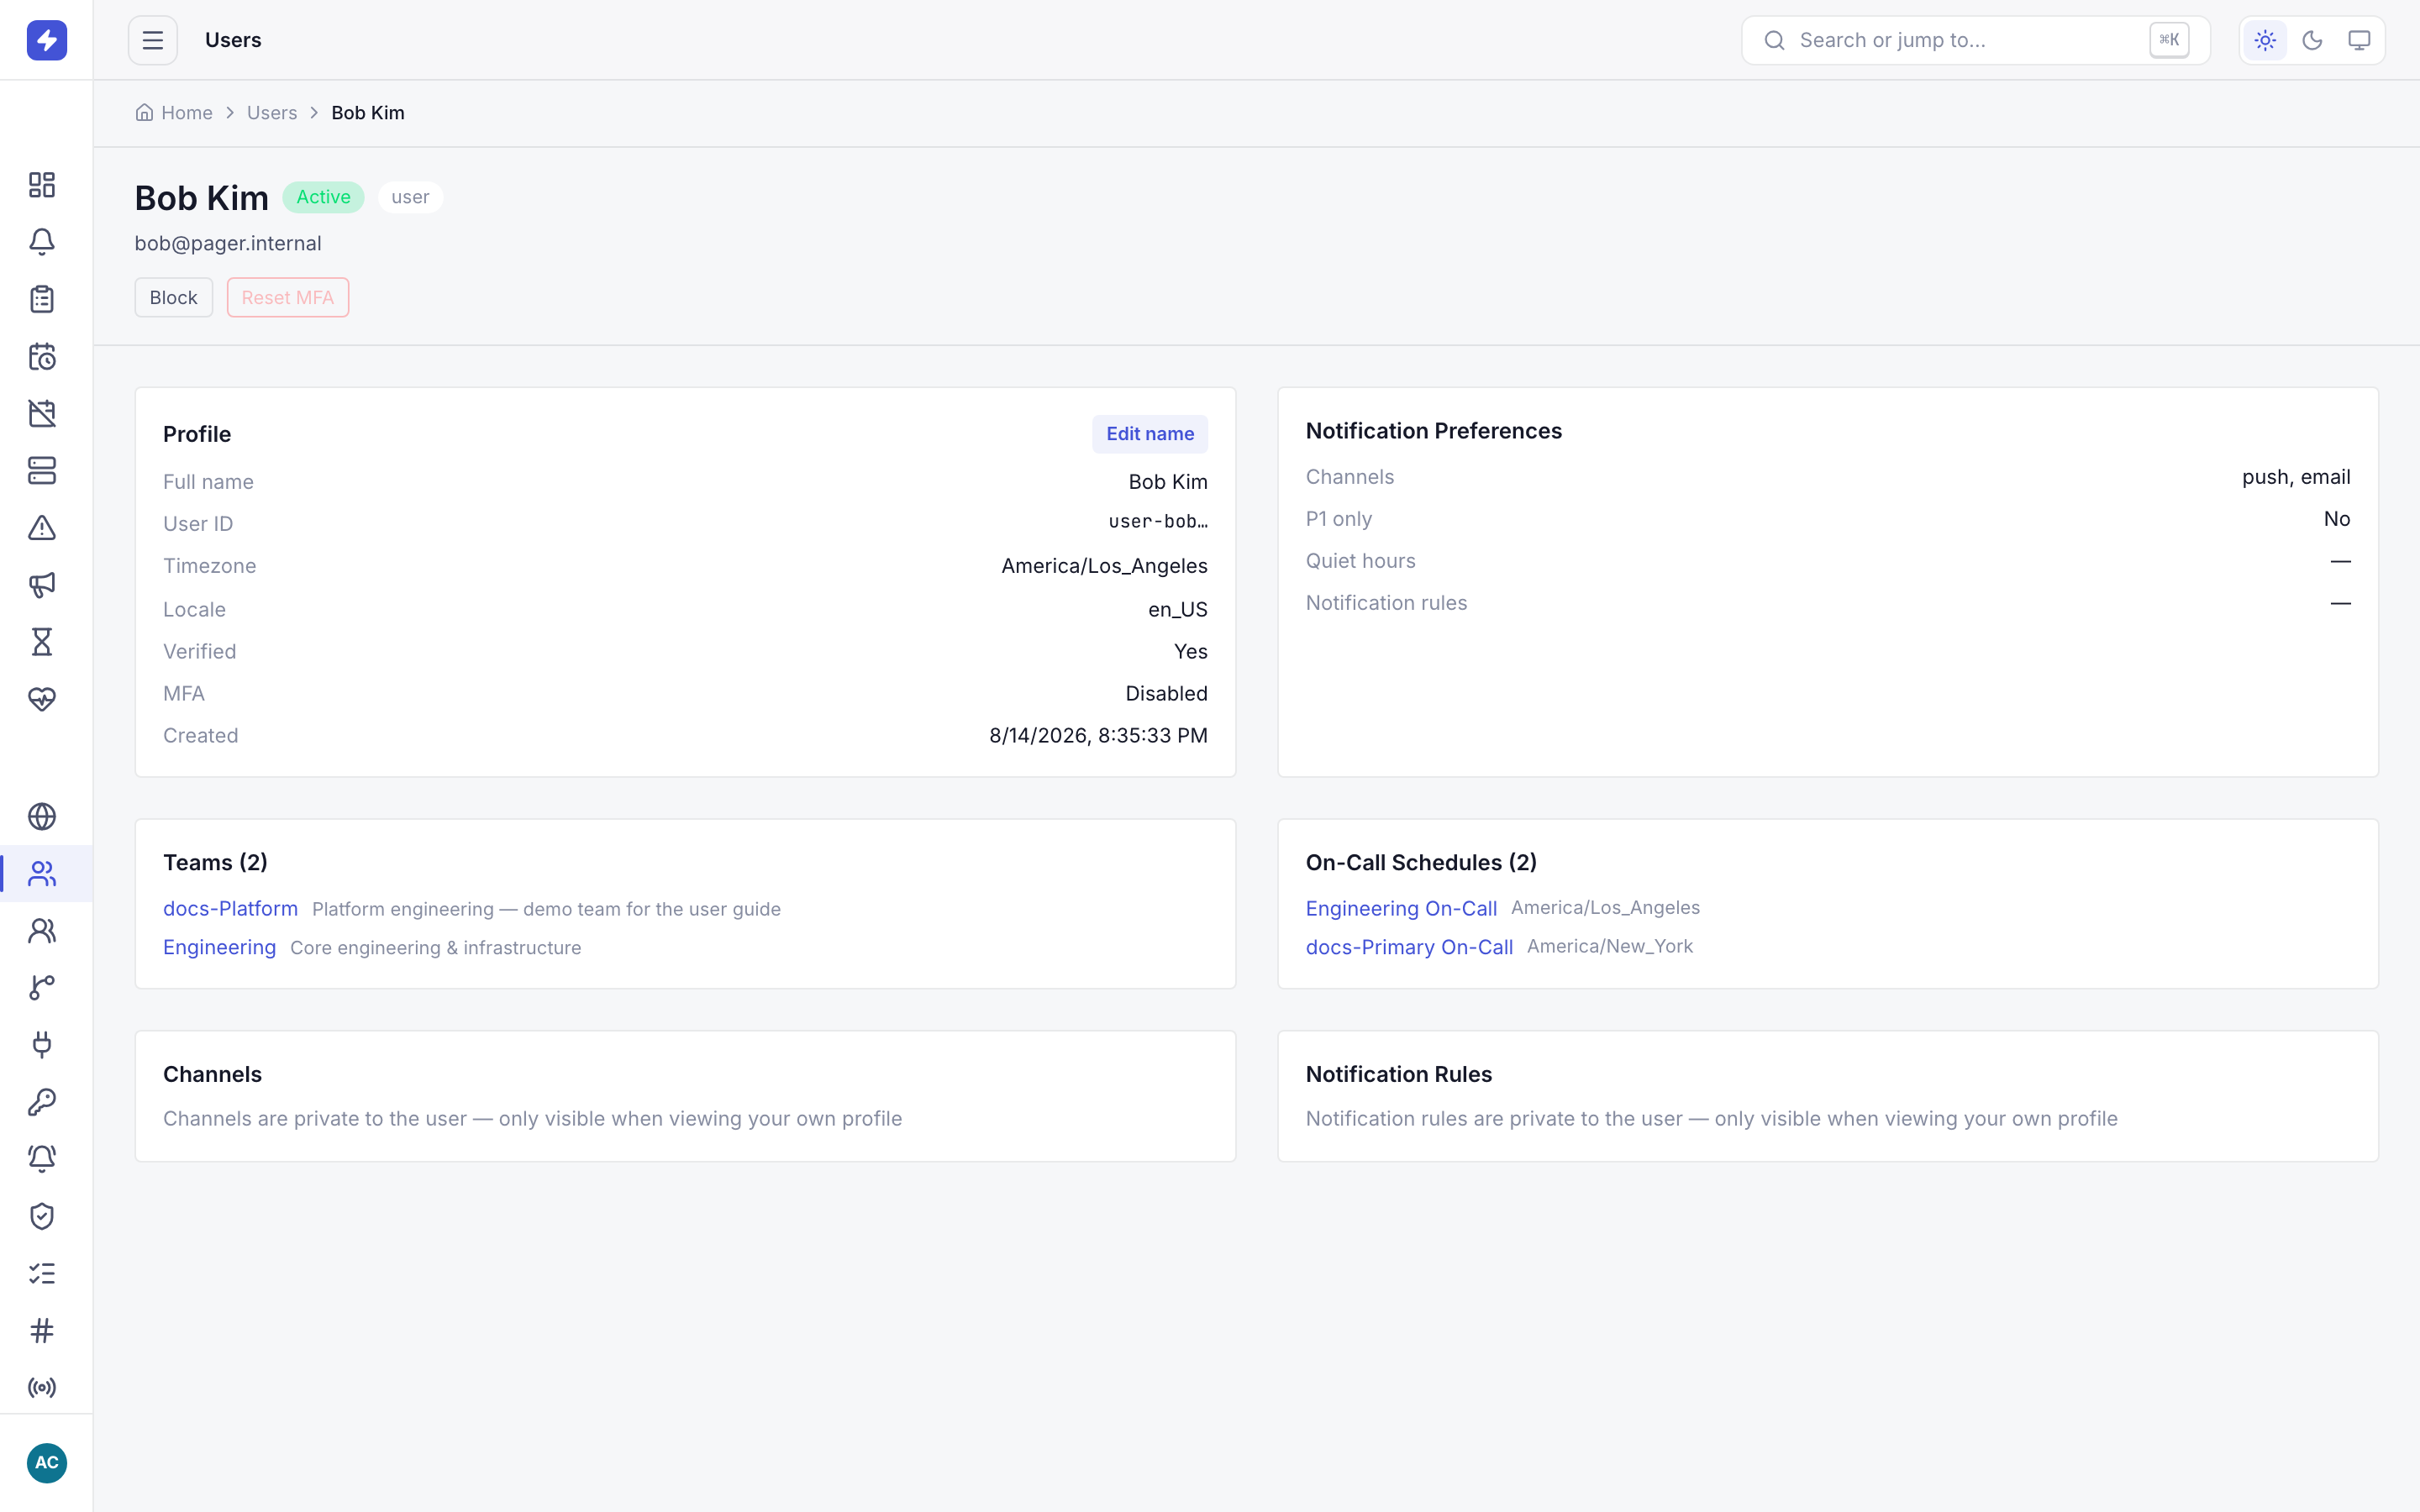
User detail combines profile, notification preferences, team memberships, on-call schedules, channels, and notification rules in one place. -
Assign roles and custom permissions
Every user has a role that sets their ceiling:
- Admin — everything: users, teams, integrations, settings, plus all responder actions across all teams.
- User — the responder role: work alerts, declare incidents, manage their own schedules, channels, and notification rules.
- Stakeholder — the free, non-paging tier: follow incidents, service health, and announcements from the mobile Status tab; stakeholders are never paged and can't join rotations.
On top of the presets, a per-user permission matrix grants custom combinations — toggle individual permissions (manage users, manage integrations, manage schedules, view reports, and so on) for the team lead who needs two admin powers, not forty.
Changing a role or permission takes effect on the next request — no need for the user to sign out.
-
Block accounts and reset MFA
Two account controls live on the users list and detail pages:
- Block / unblock — blocking immediately invalidates the user's sessions and API access; they get a 403 on their next request. Unblocking restores access without touching their password or settings. Use it for departures and lost laptops.
- MFA reset — clears the user's enrolled MFA factor so they can re-enroll on next sign-in. The standard recovery when someone replaces their phone.
NoteBoth actions land in the audit log with the admin who performed them — nobody silently loses or regains access.
-
Set up two-factor authentication on your own account
The MFA reset above is what an admin does to clear someone else's factor. To protect your own account, enroll a TOTP factor yourself: go to Settings → Two-Factor Authentication and click Set up.
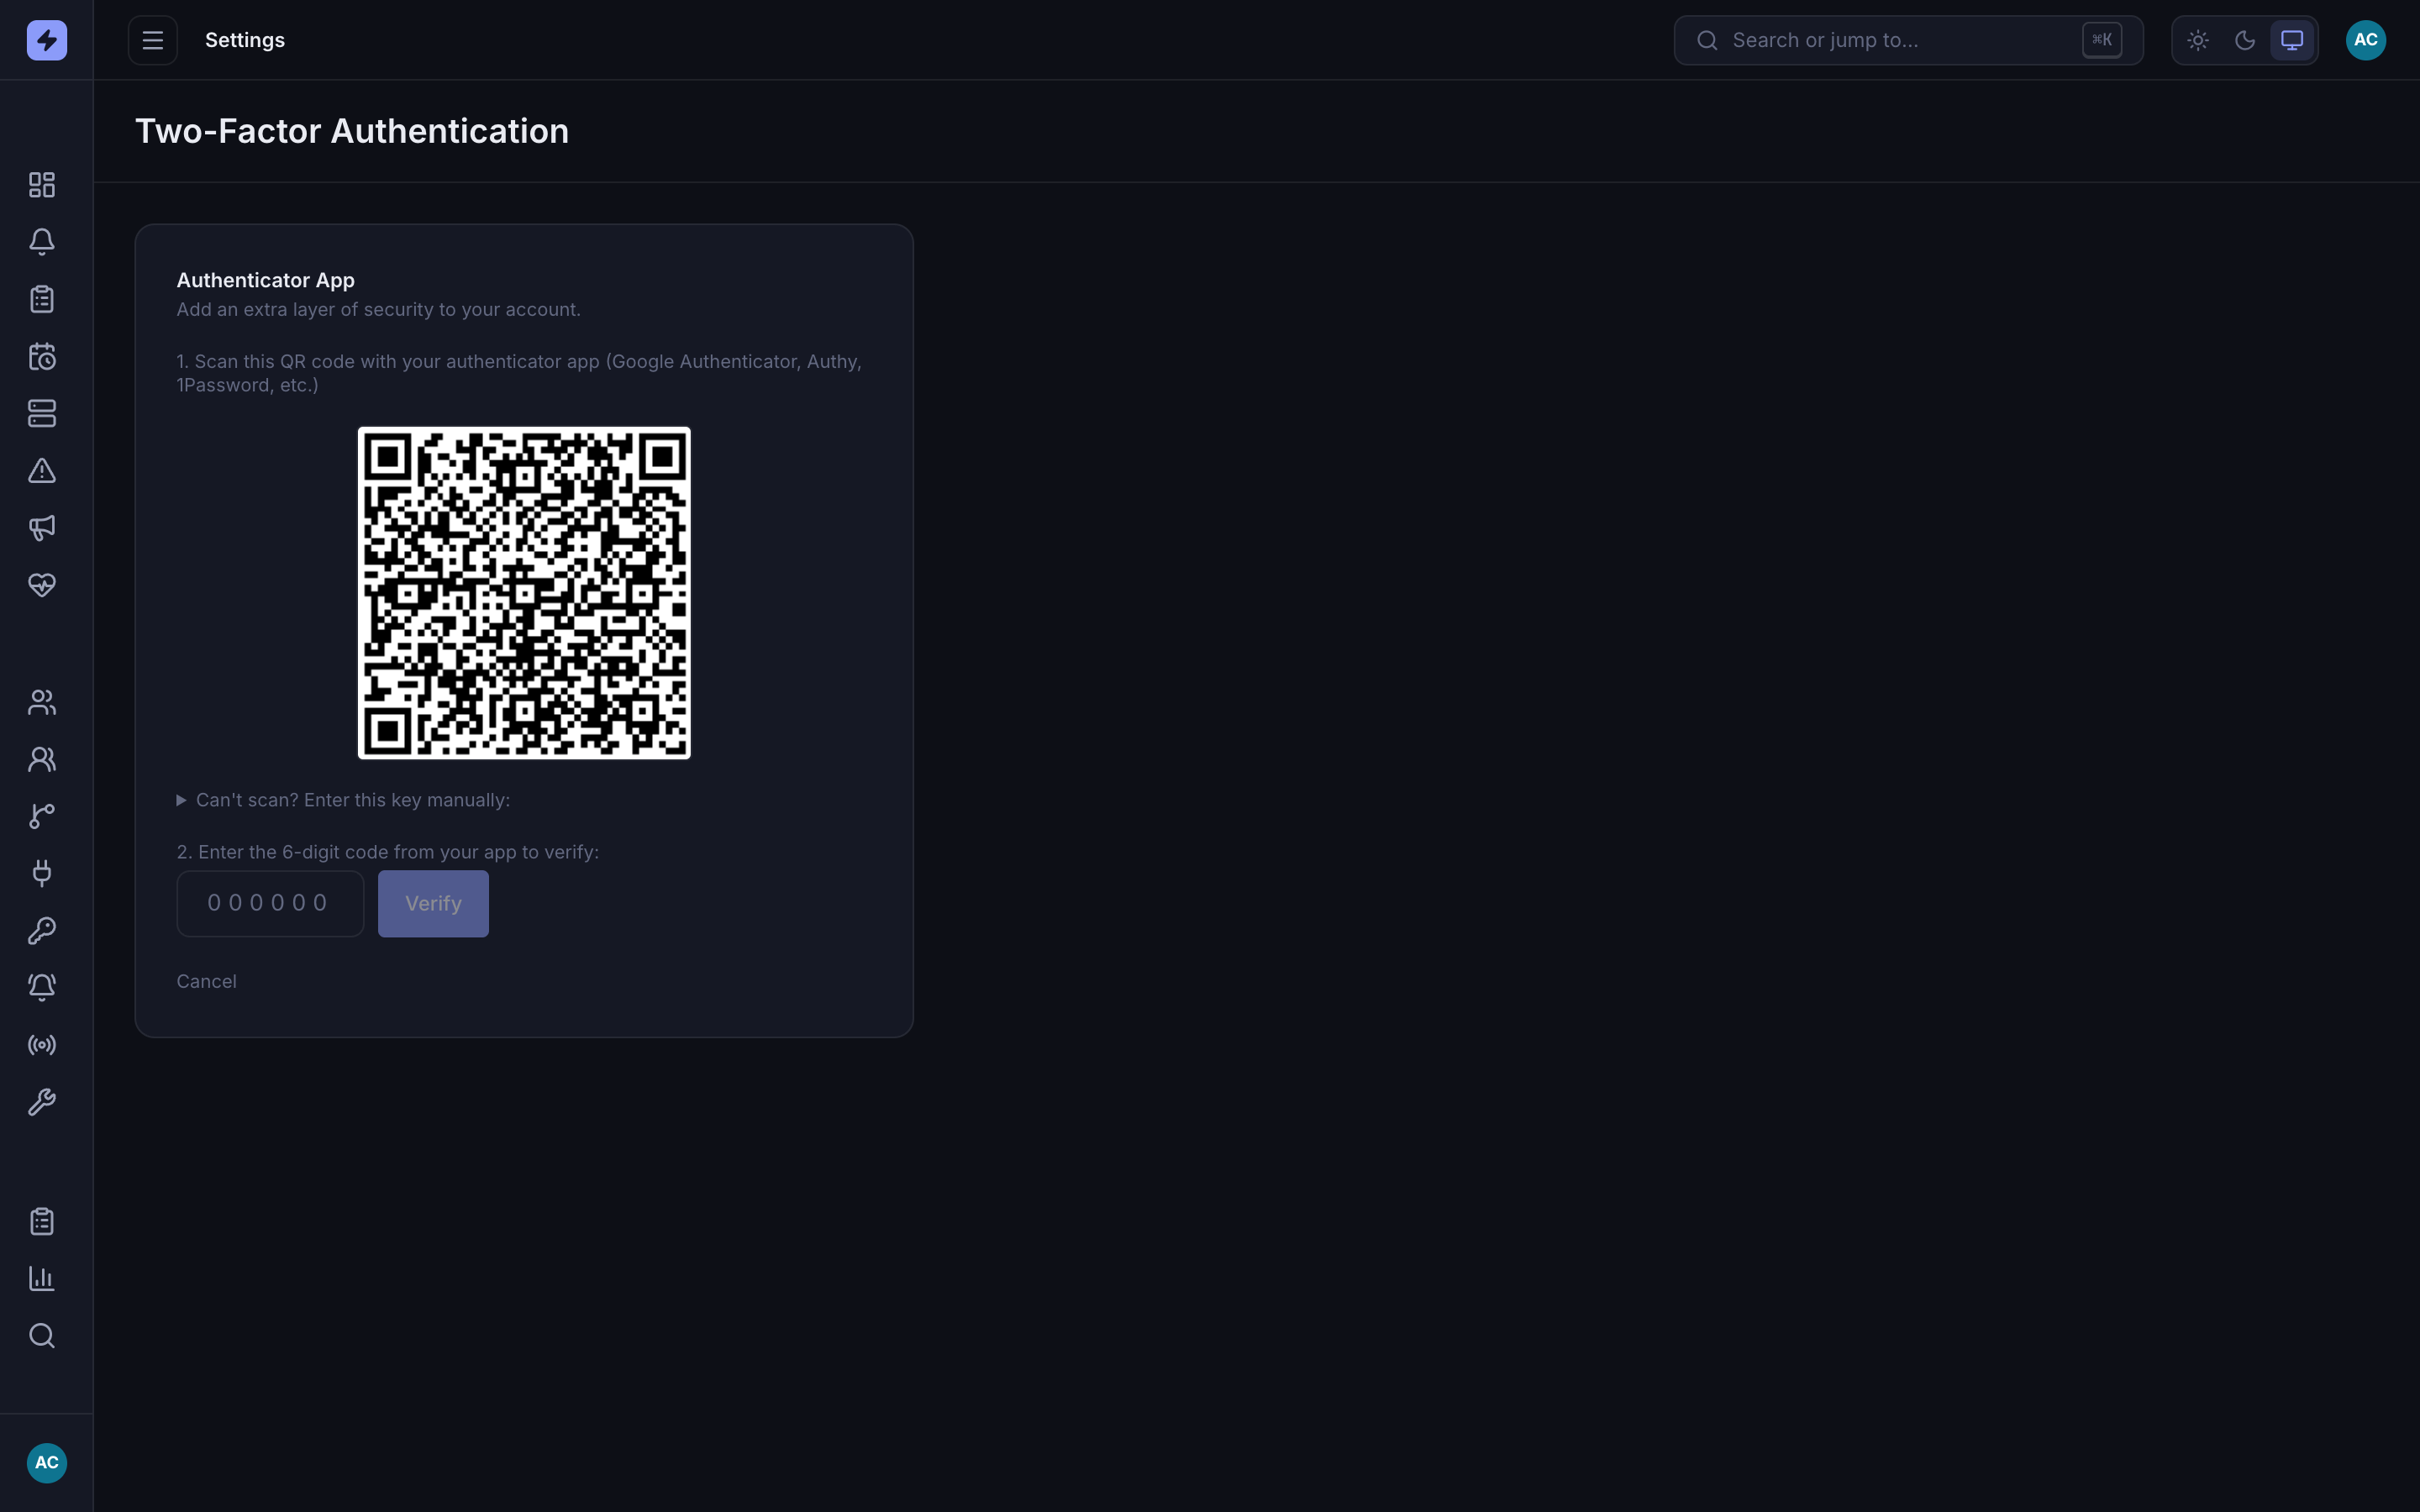
Enrolling your own MFA: scan the QR code with an authenticator app (Google Authenticator, Authy, 1Password), or enter the key manually, then type the 6-digit code to verify. Scan the QR (or paste the manual key) into your authenticator app, then enter the 6-digit code to confirm. After verification OpsPing shows a set of backup codes — save them somewhere safe. They're your way back in if you lose the phone; an admin MFA reset is the fallback.
-
Connect tools with integrations and API keys
Integrations issue the API keys your monitoring tools use to push alerts in. Each key carries per-key scopes — read, write, delete, config — so a tool that only creates alerts never holds a key that can close them.
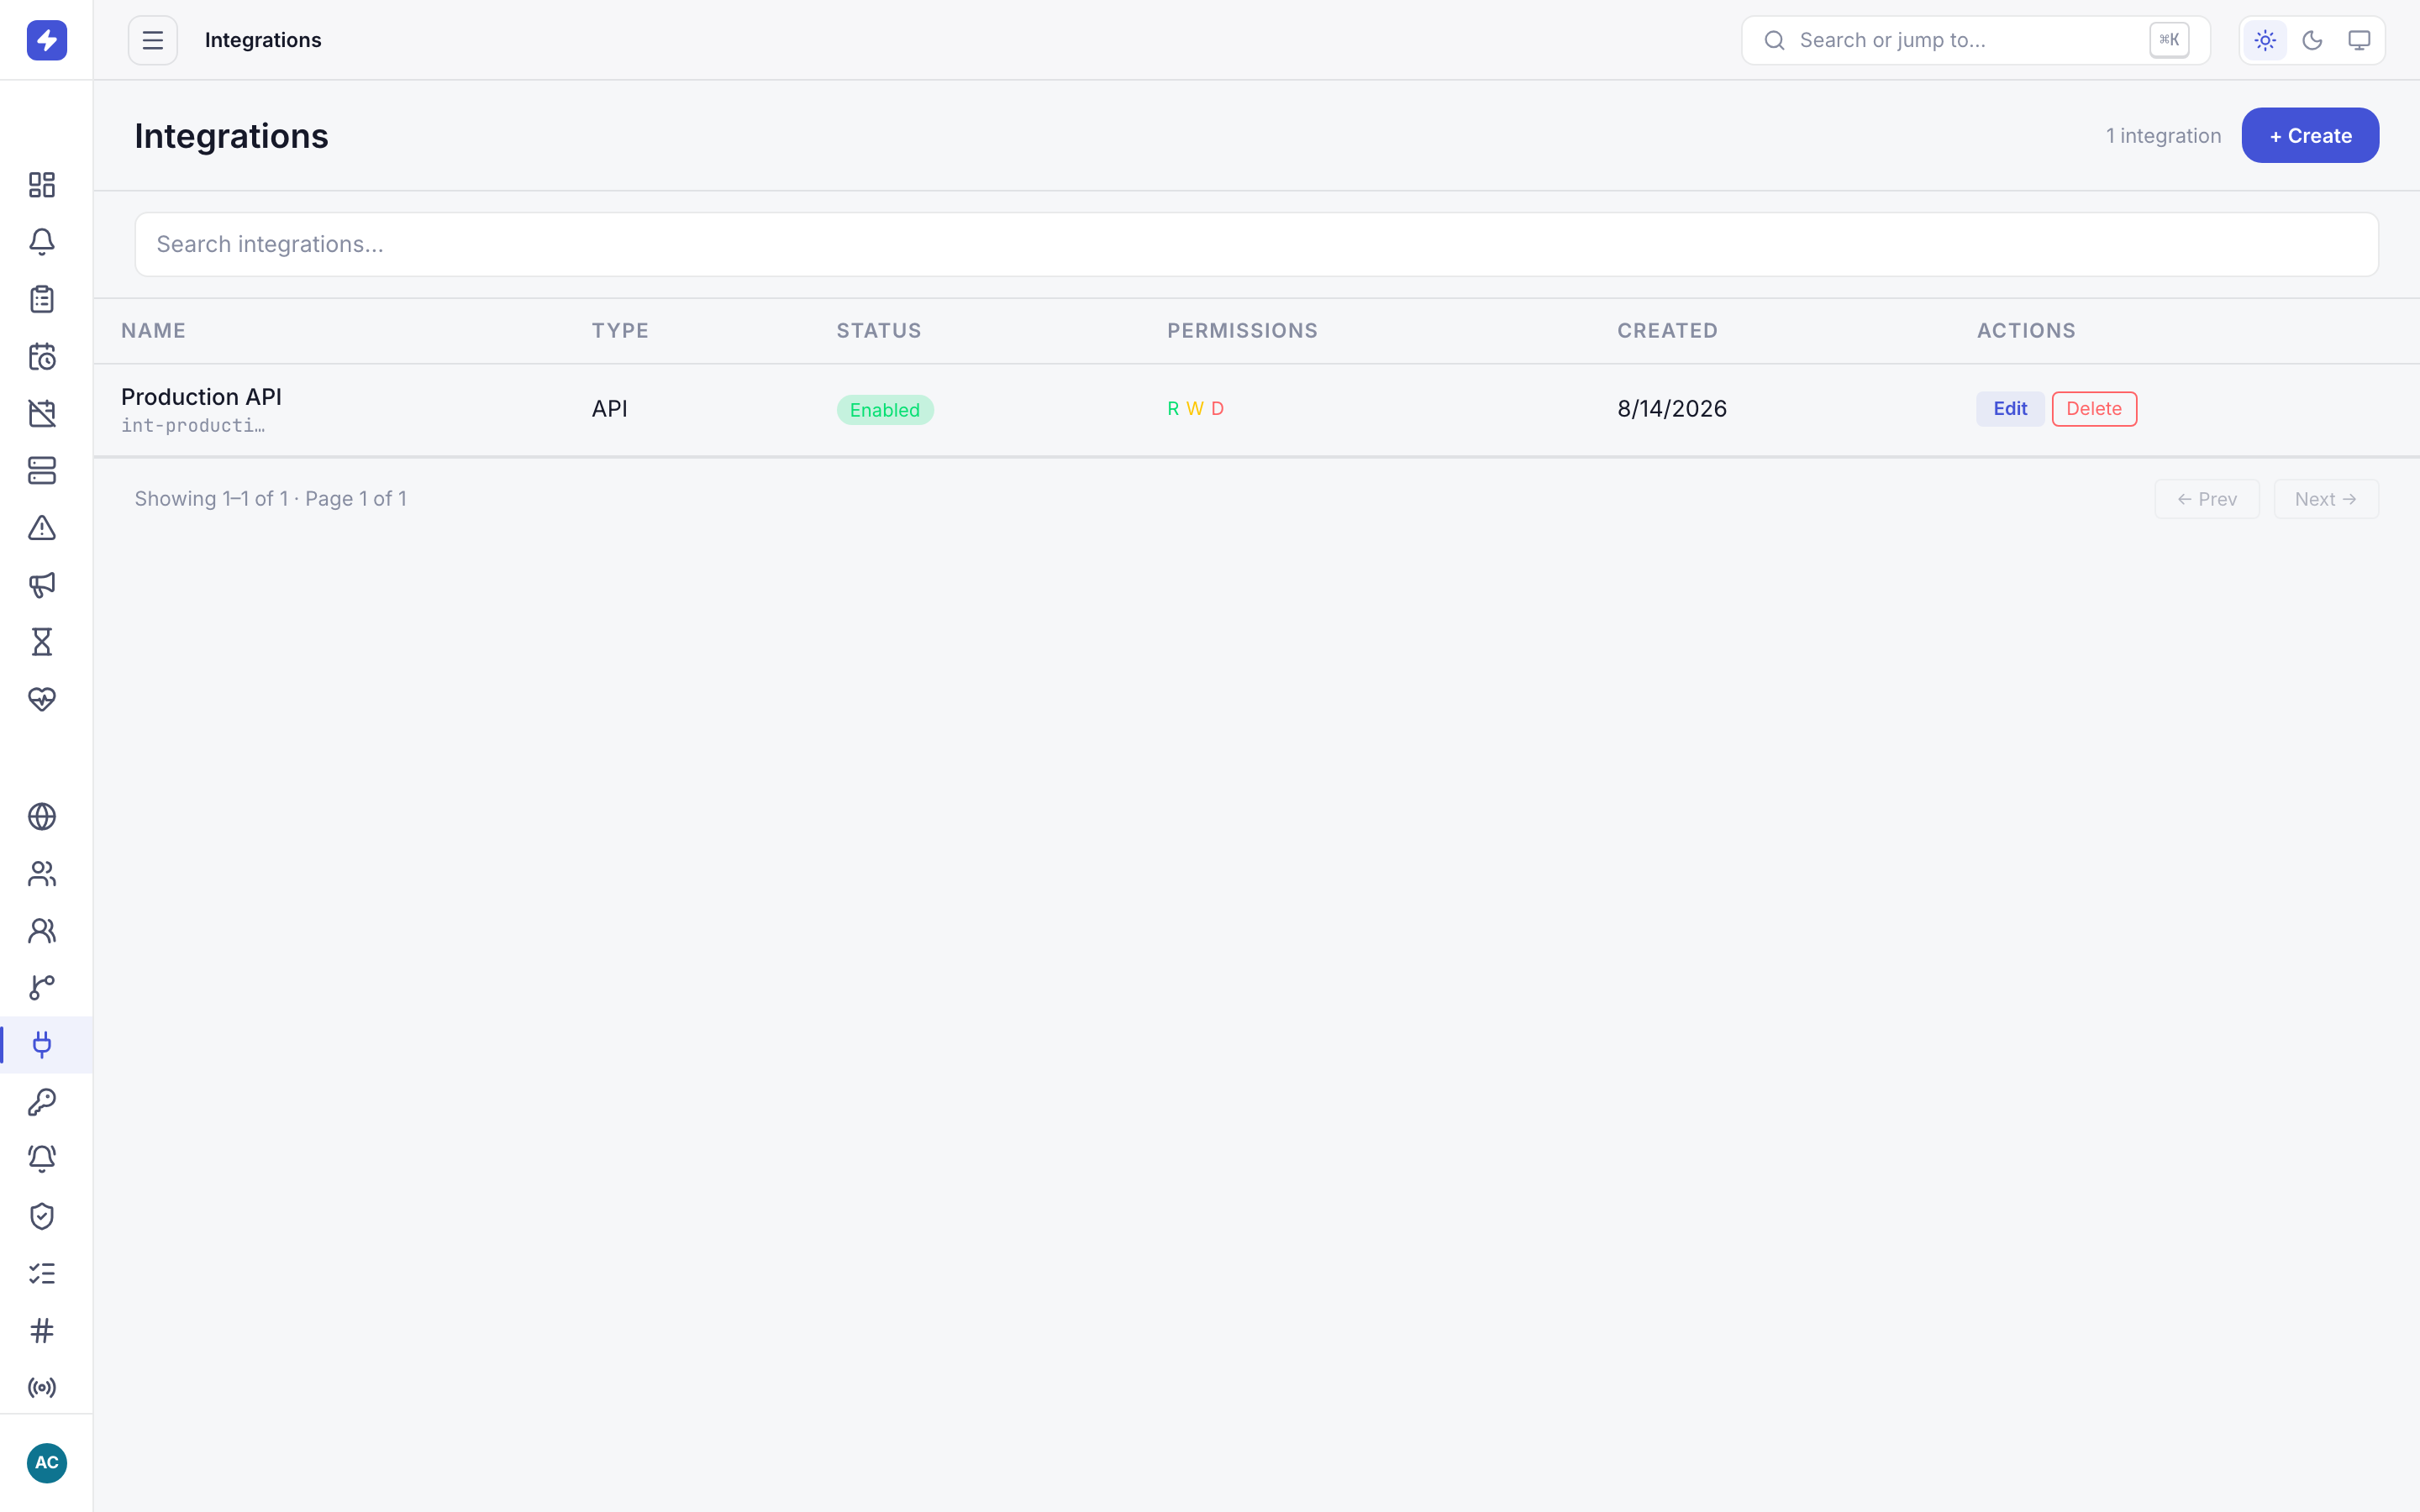
Integrations issue API keys for inbound alert creation from your monitoring tools, with per-key read/write/delete/config scopes. Creating an integration shows the generated key exactly once — copy it into your secrets manager before closing the dialog. Losing it means regenerating, which kills the old key immediately.
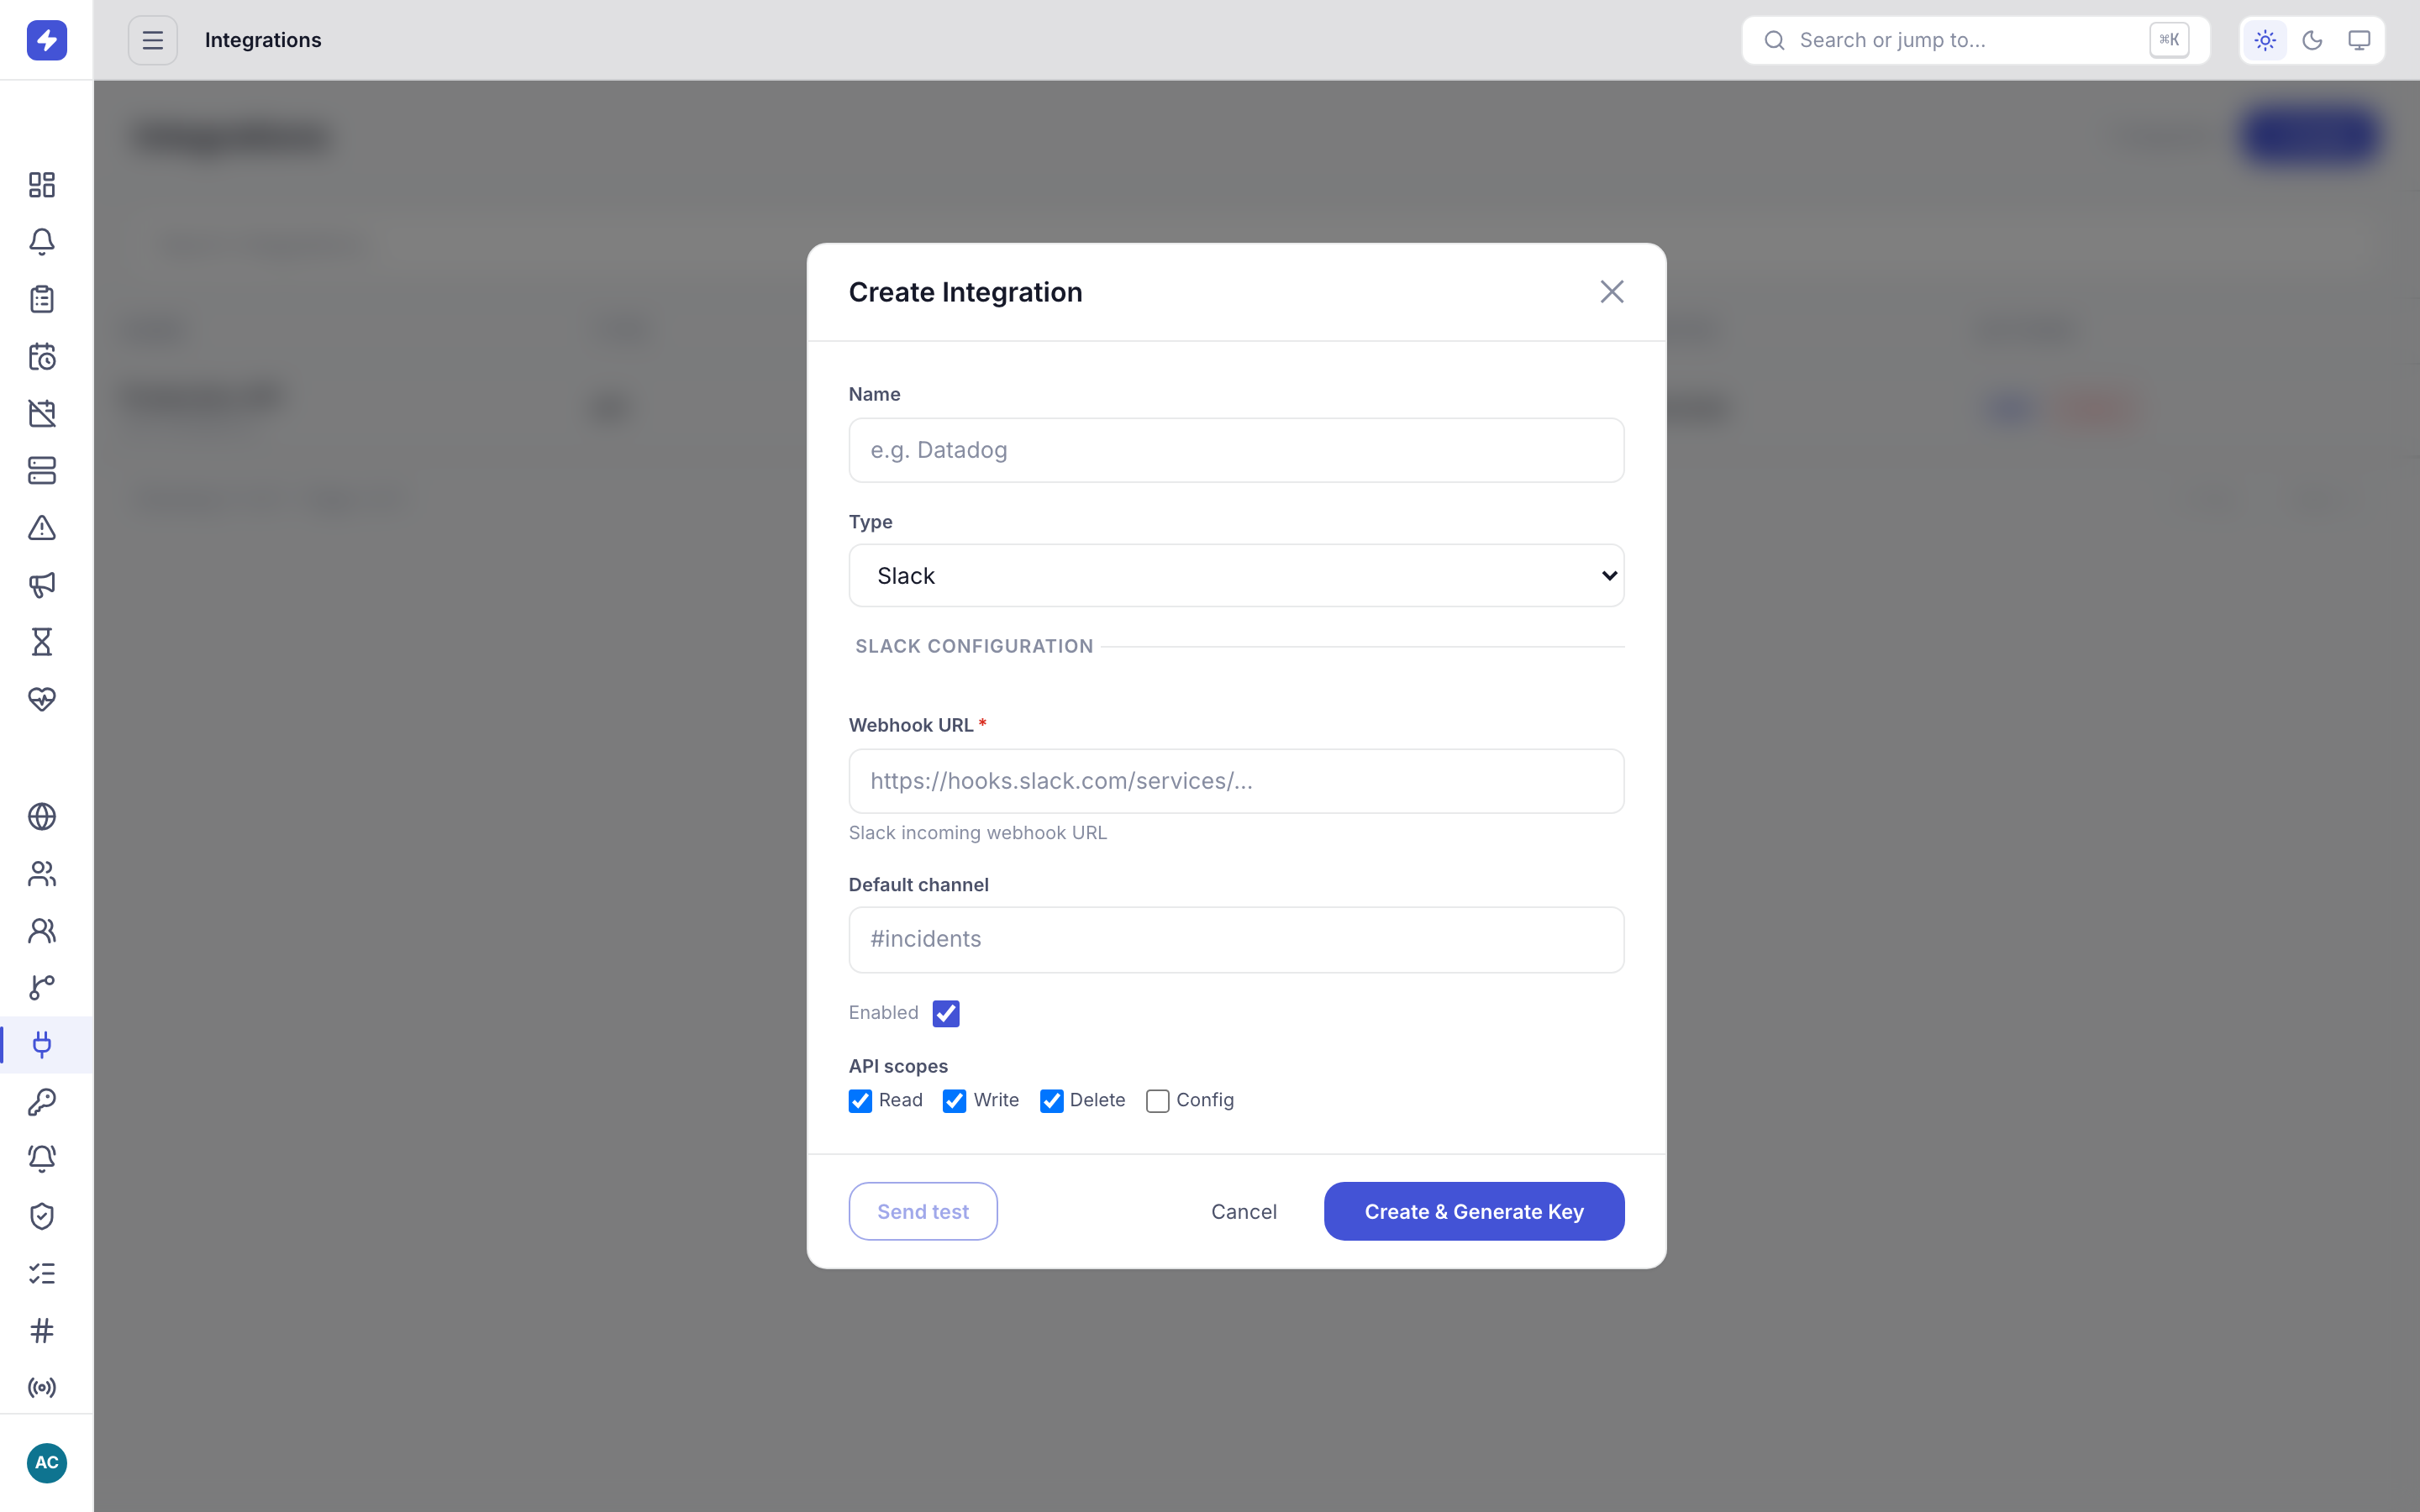
Creating an integration: pick a type, set scopes, and OpsPing generates an API key shown once after creation. TipOne integration per tool per environment (
prometheus-prod,prometheus-staging) beats one shared key for everything: you can revoke a noisy source without taking the rest of your monitoring down with it. -
Answer "who did what" with the audit log
Every mutation — alert actions, config changes, logins, blocks, key regeneration — lands in the audit log with actor, action, entity, and timestamp. Filter by entity type, action, user, and date range to reconstruct exactly what happened during an incident or an access review.
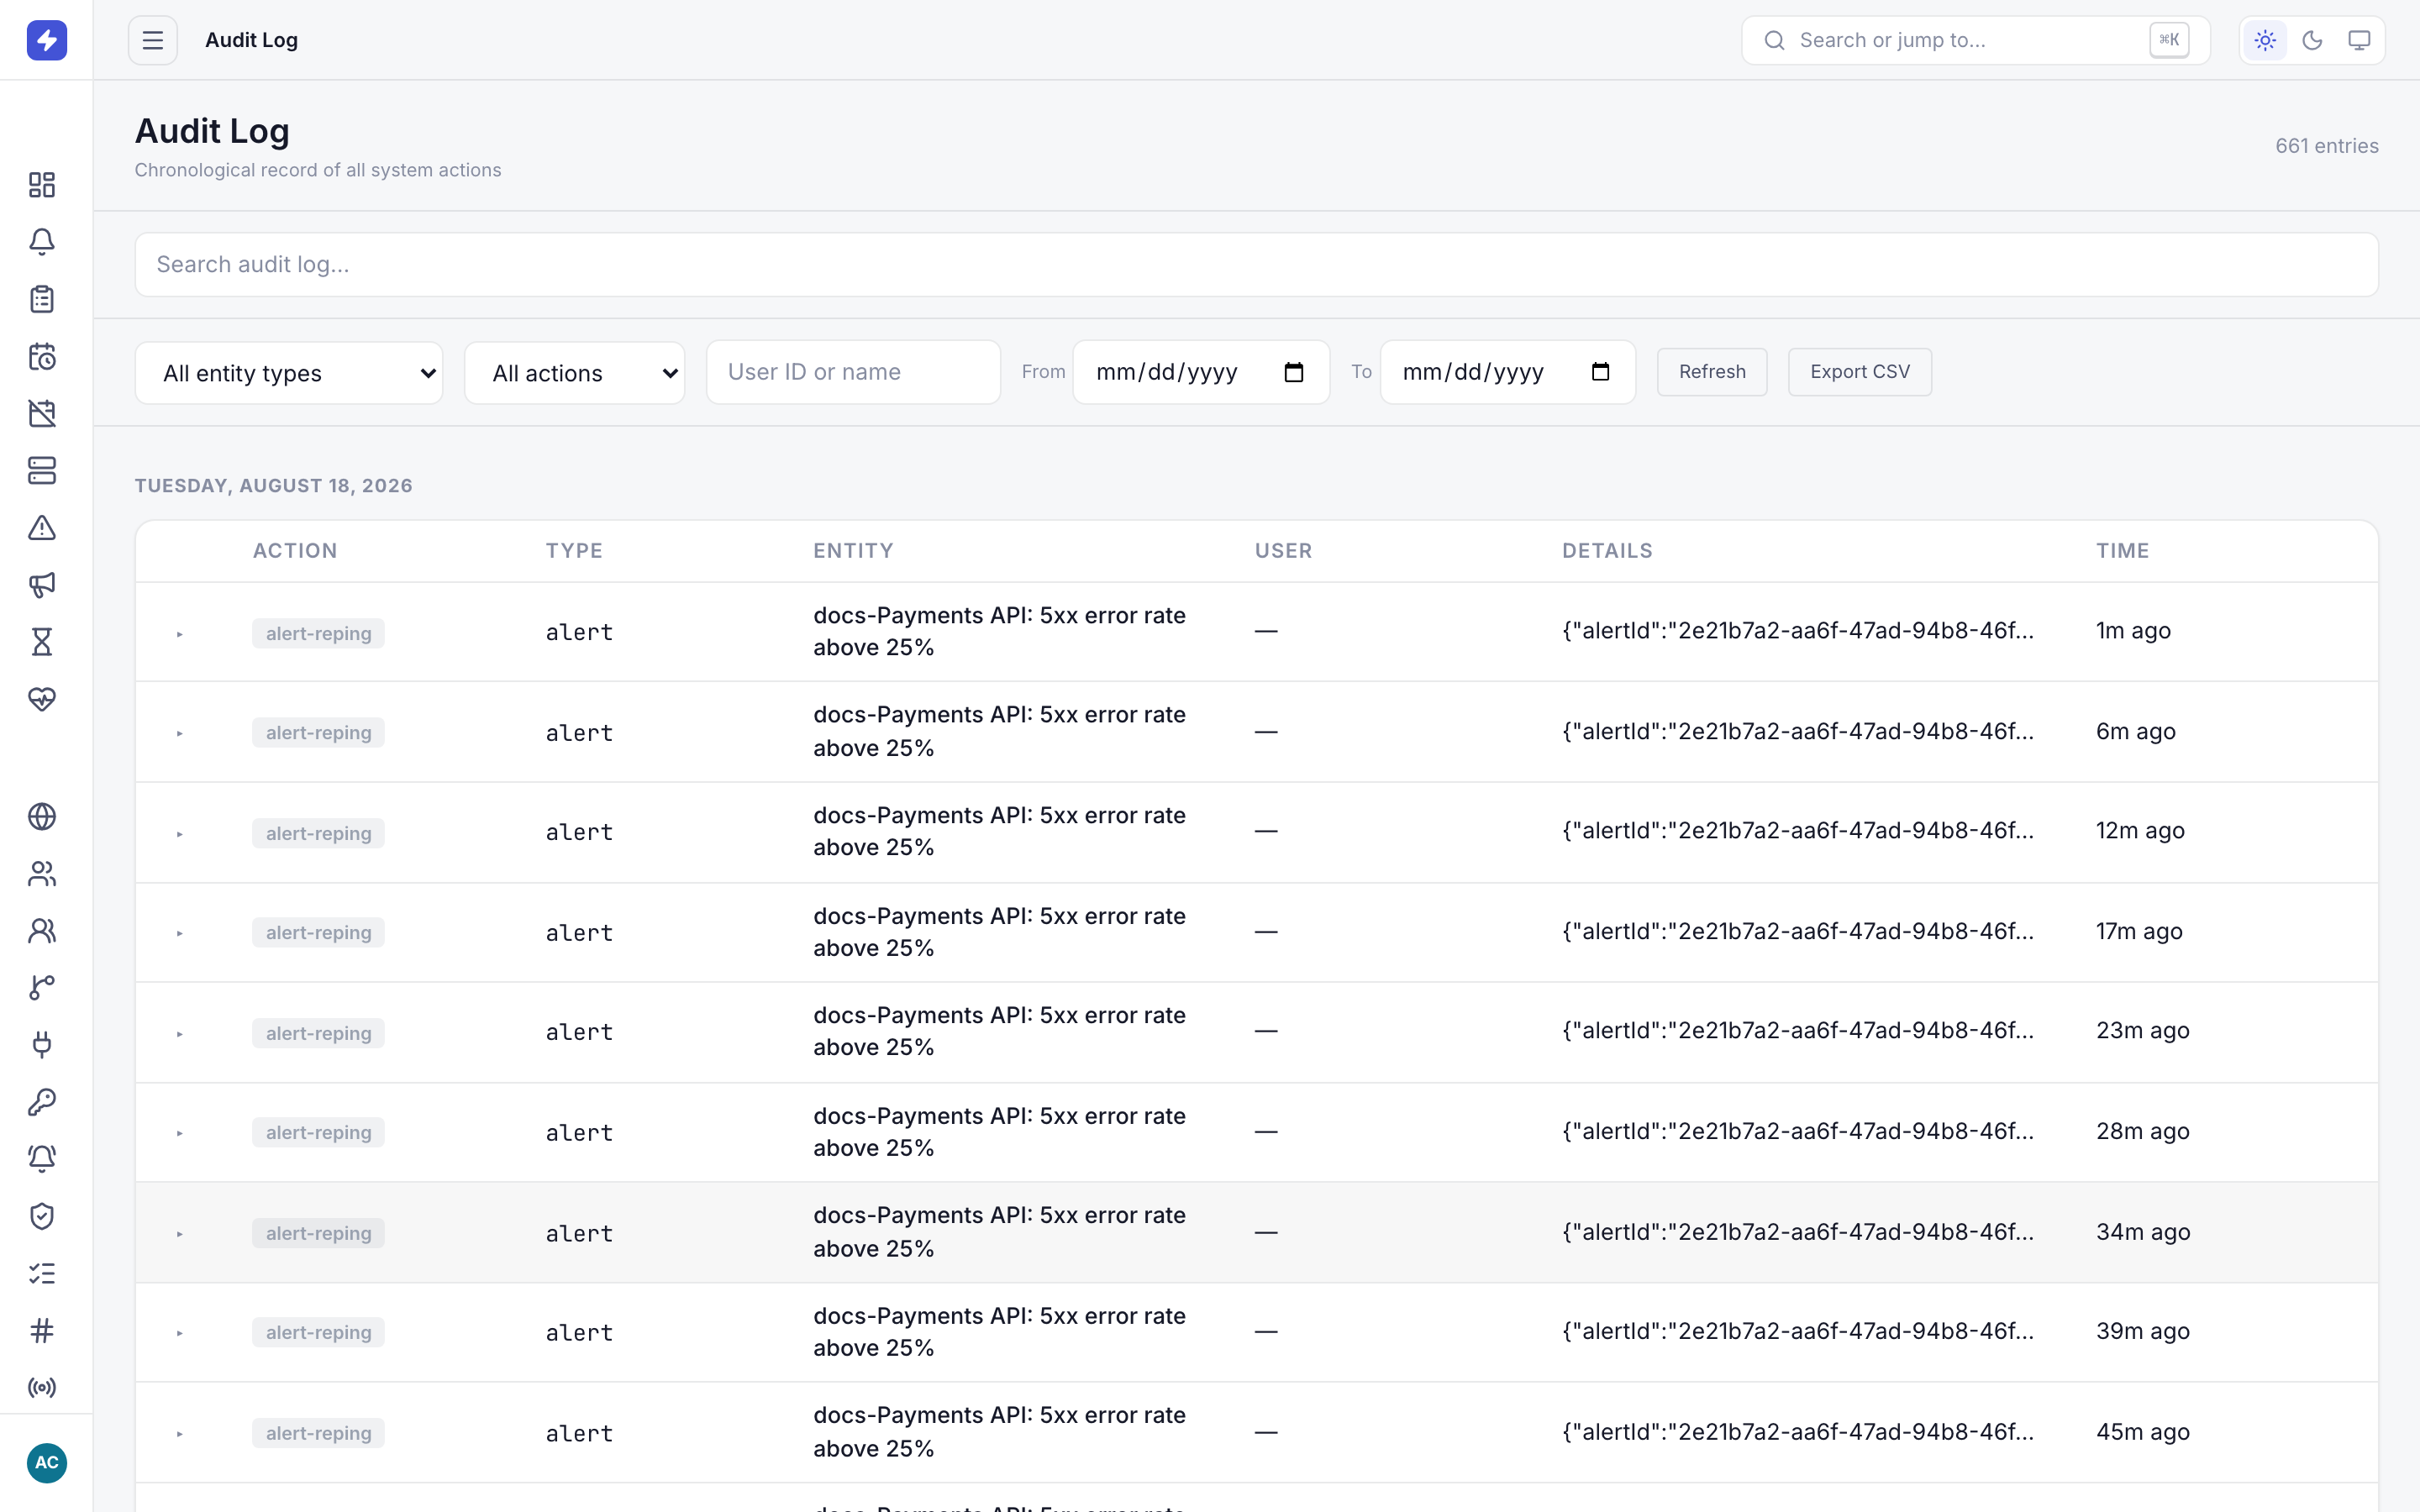
The audit log records every mutation — alert actions, config changes, logins — filterable by entity type, action, user, and date range. -
Granting support access
OpsPing has zero standing access — staff can't read your alerts unless you let them in. When you need hands-on help from OpsPing support:
- Invite support@ops-ping.com through the normal invite flow, with the least role needed for the task (usually user; admin only when the problem itself is administrative).
- Support works the issue inside your organization — every action lands in your audit log, attributed to the support account.
- When the issue is resolved, delete the support user (or let the invite lapse if it was never accepted). Access ends immediately.
- Review the audit log to confirm exactly what was done while support had access.
NoteSupport holds no standing access between invitations — revoking the user returns you to a state where no one outside your organization can see your data.
-
Measure response with reports
Reports & Analytics turns the alert history into numbers: volume trends, MTTA/MTTR, and breakdowns by priority, team, and source — with CSV/PDF export for the review meeting. Reports are team-scoped: admins see every team, regular users see their own.
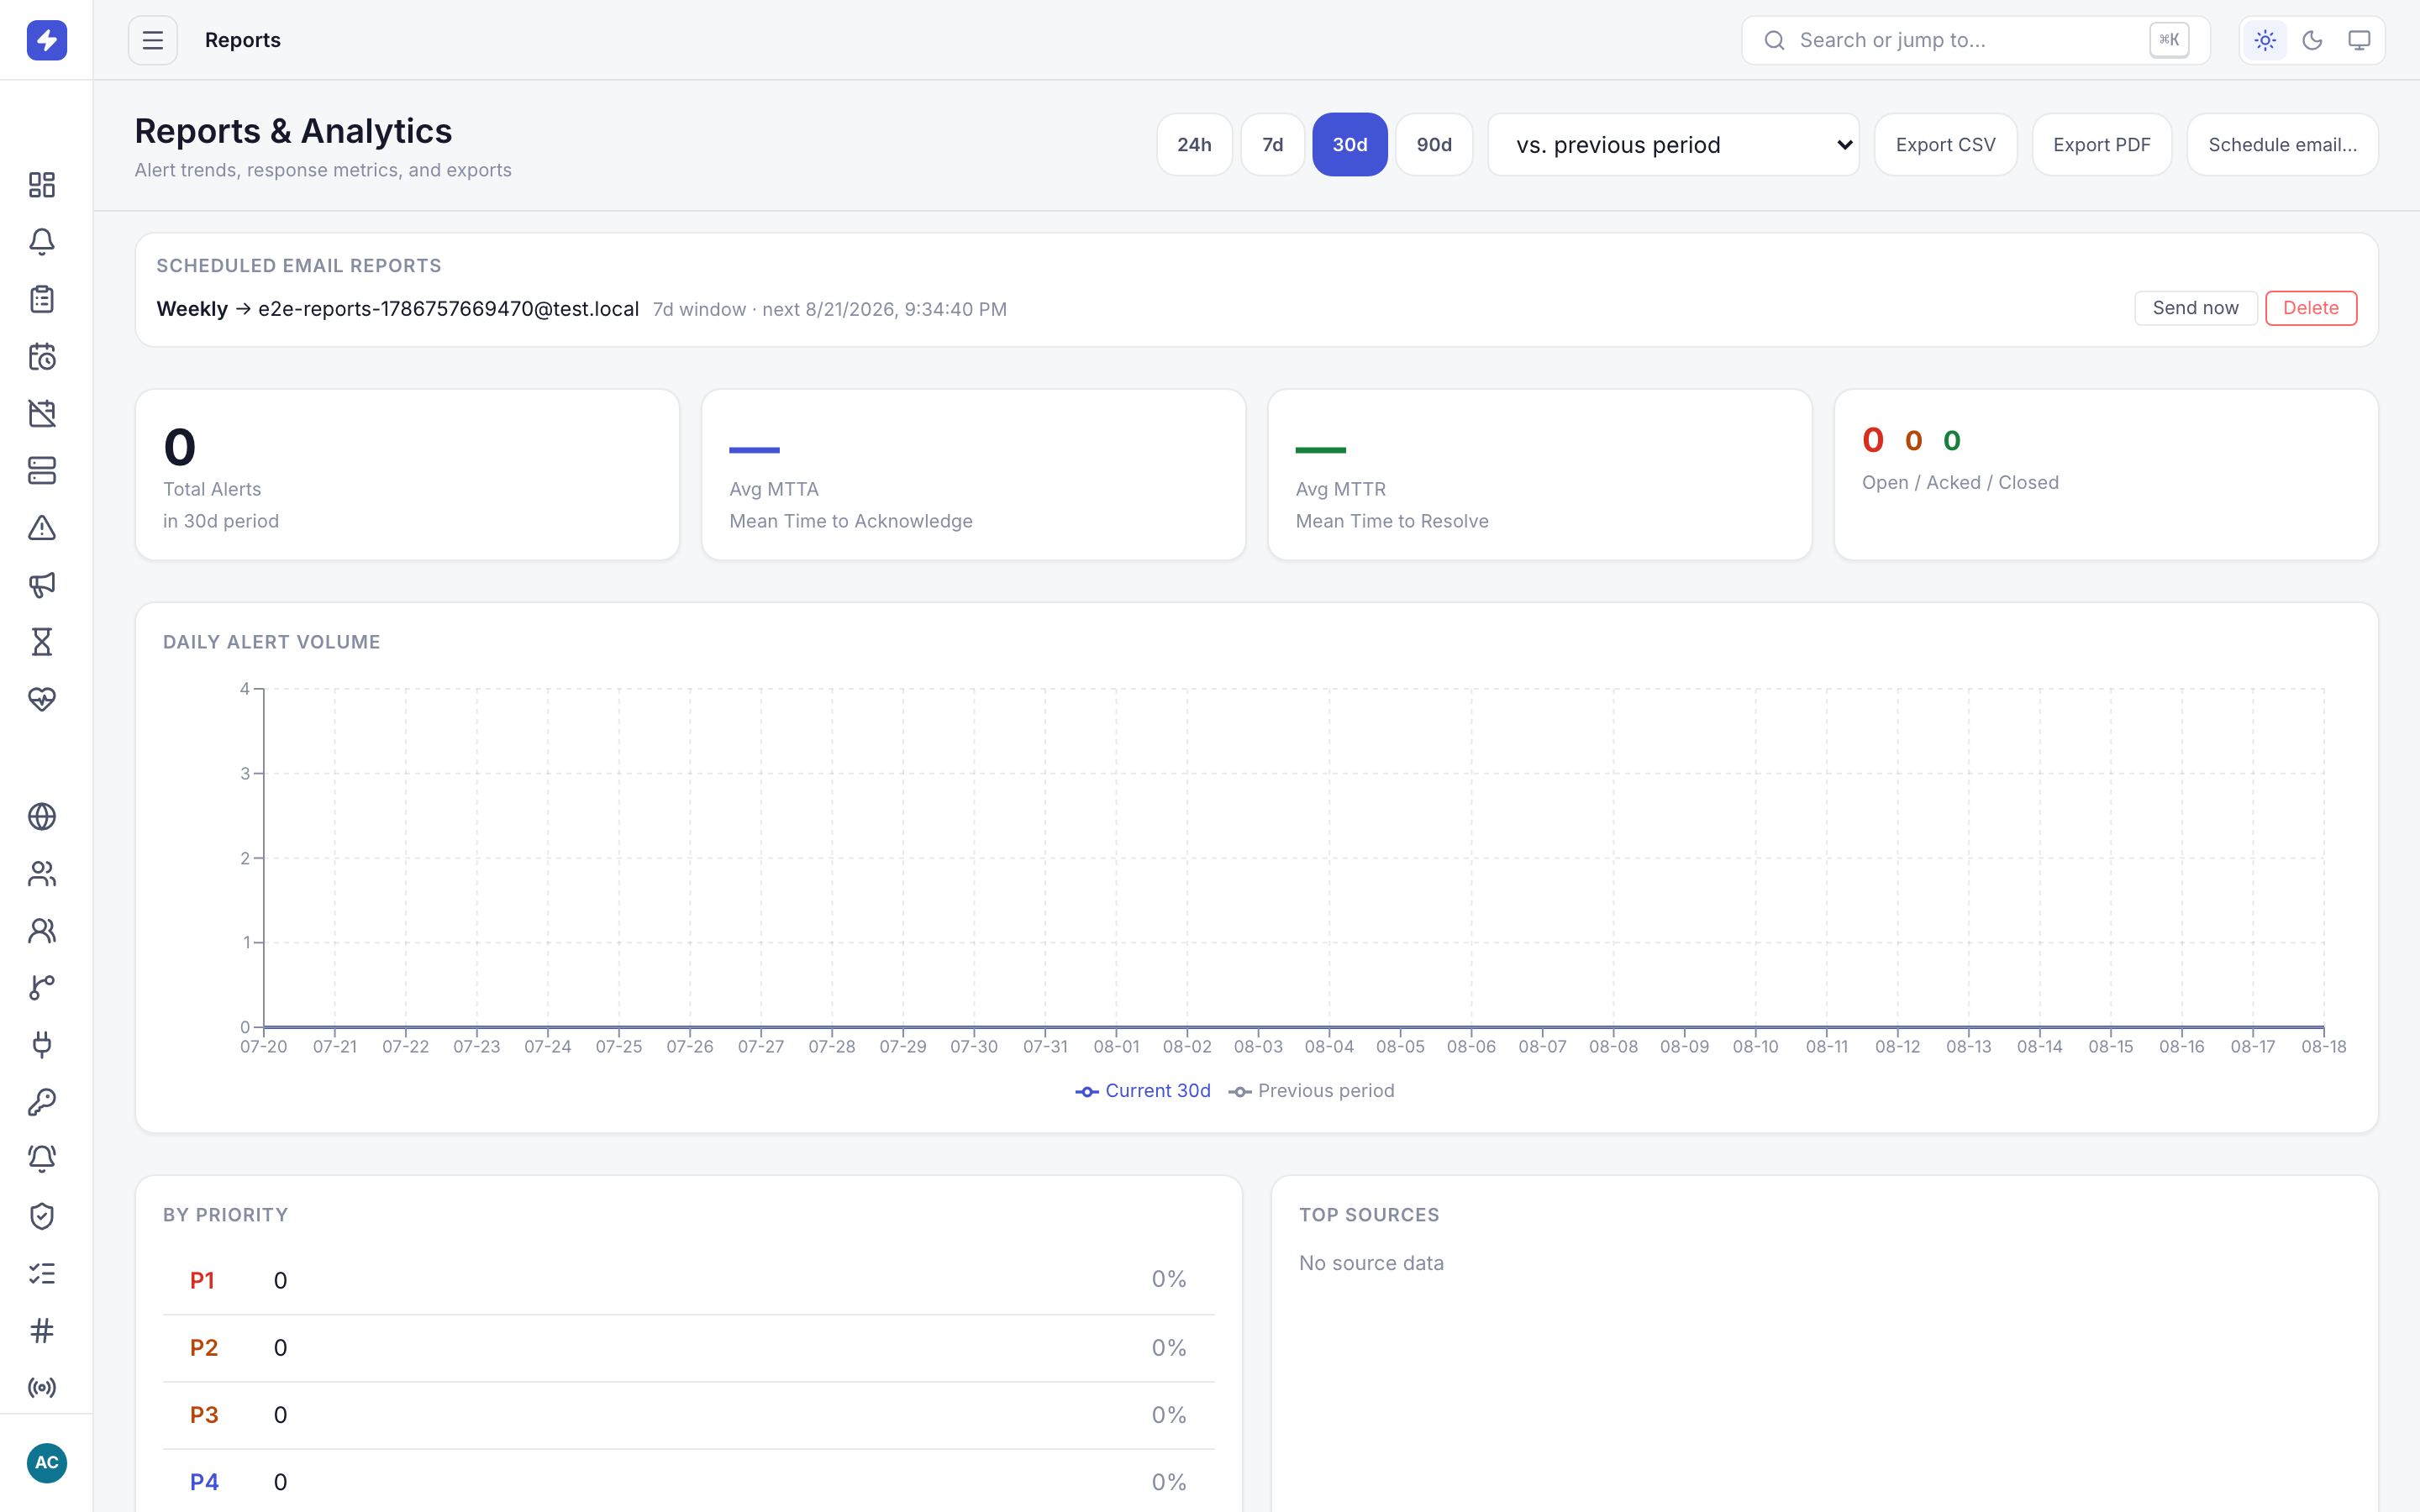
Reports & Analytics: alert volume trends, MTTA/MTTR, breakdowns by priority, team, and source, with CSV/PDF export. -
Configure the account in settings
Settings holds account details, security options like MFA enrollment, and — for admins — the SSO (OIDC) configuration for the workspace. This is also where each user manages their own profile and notification preferences.
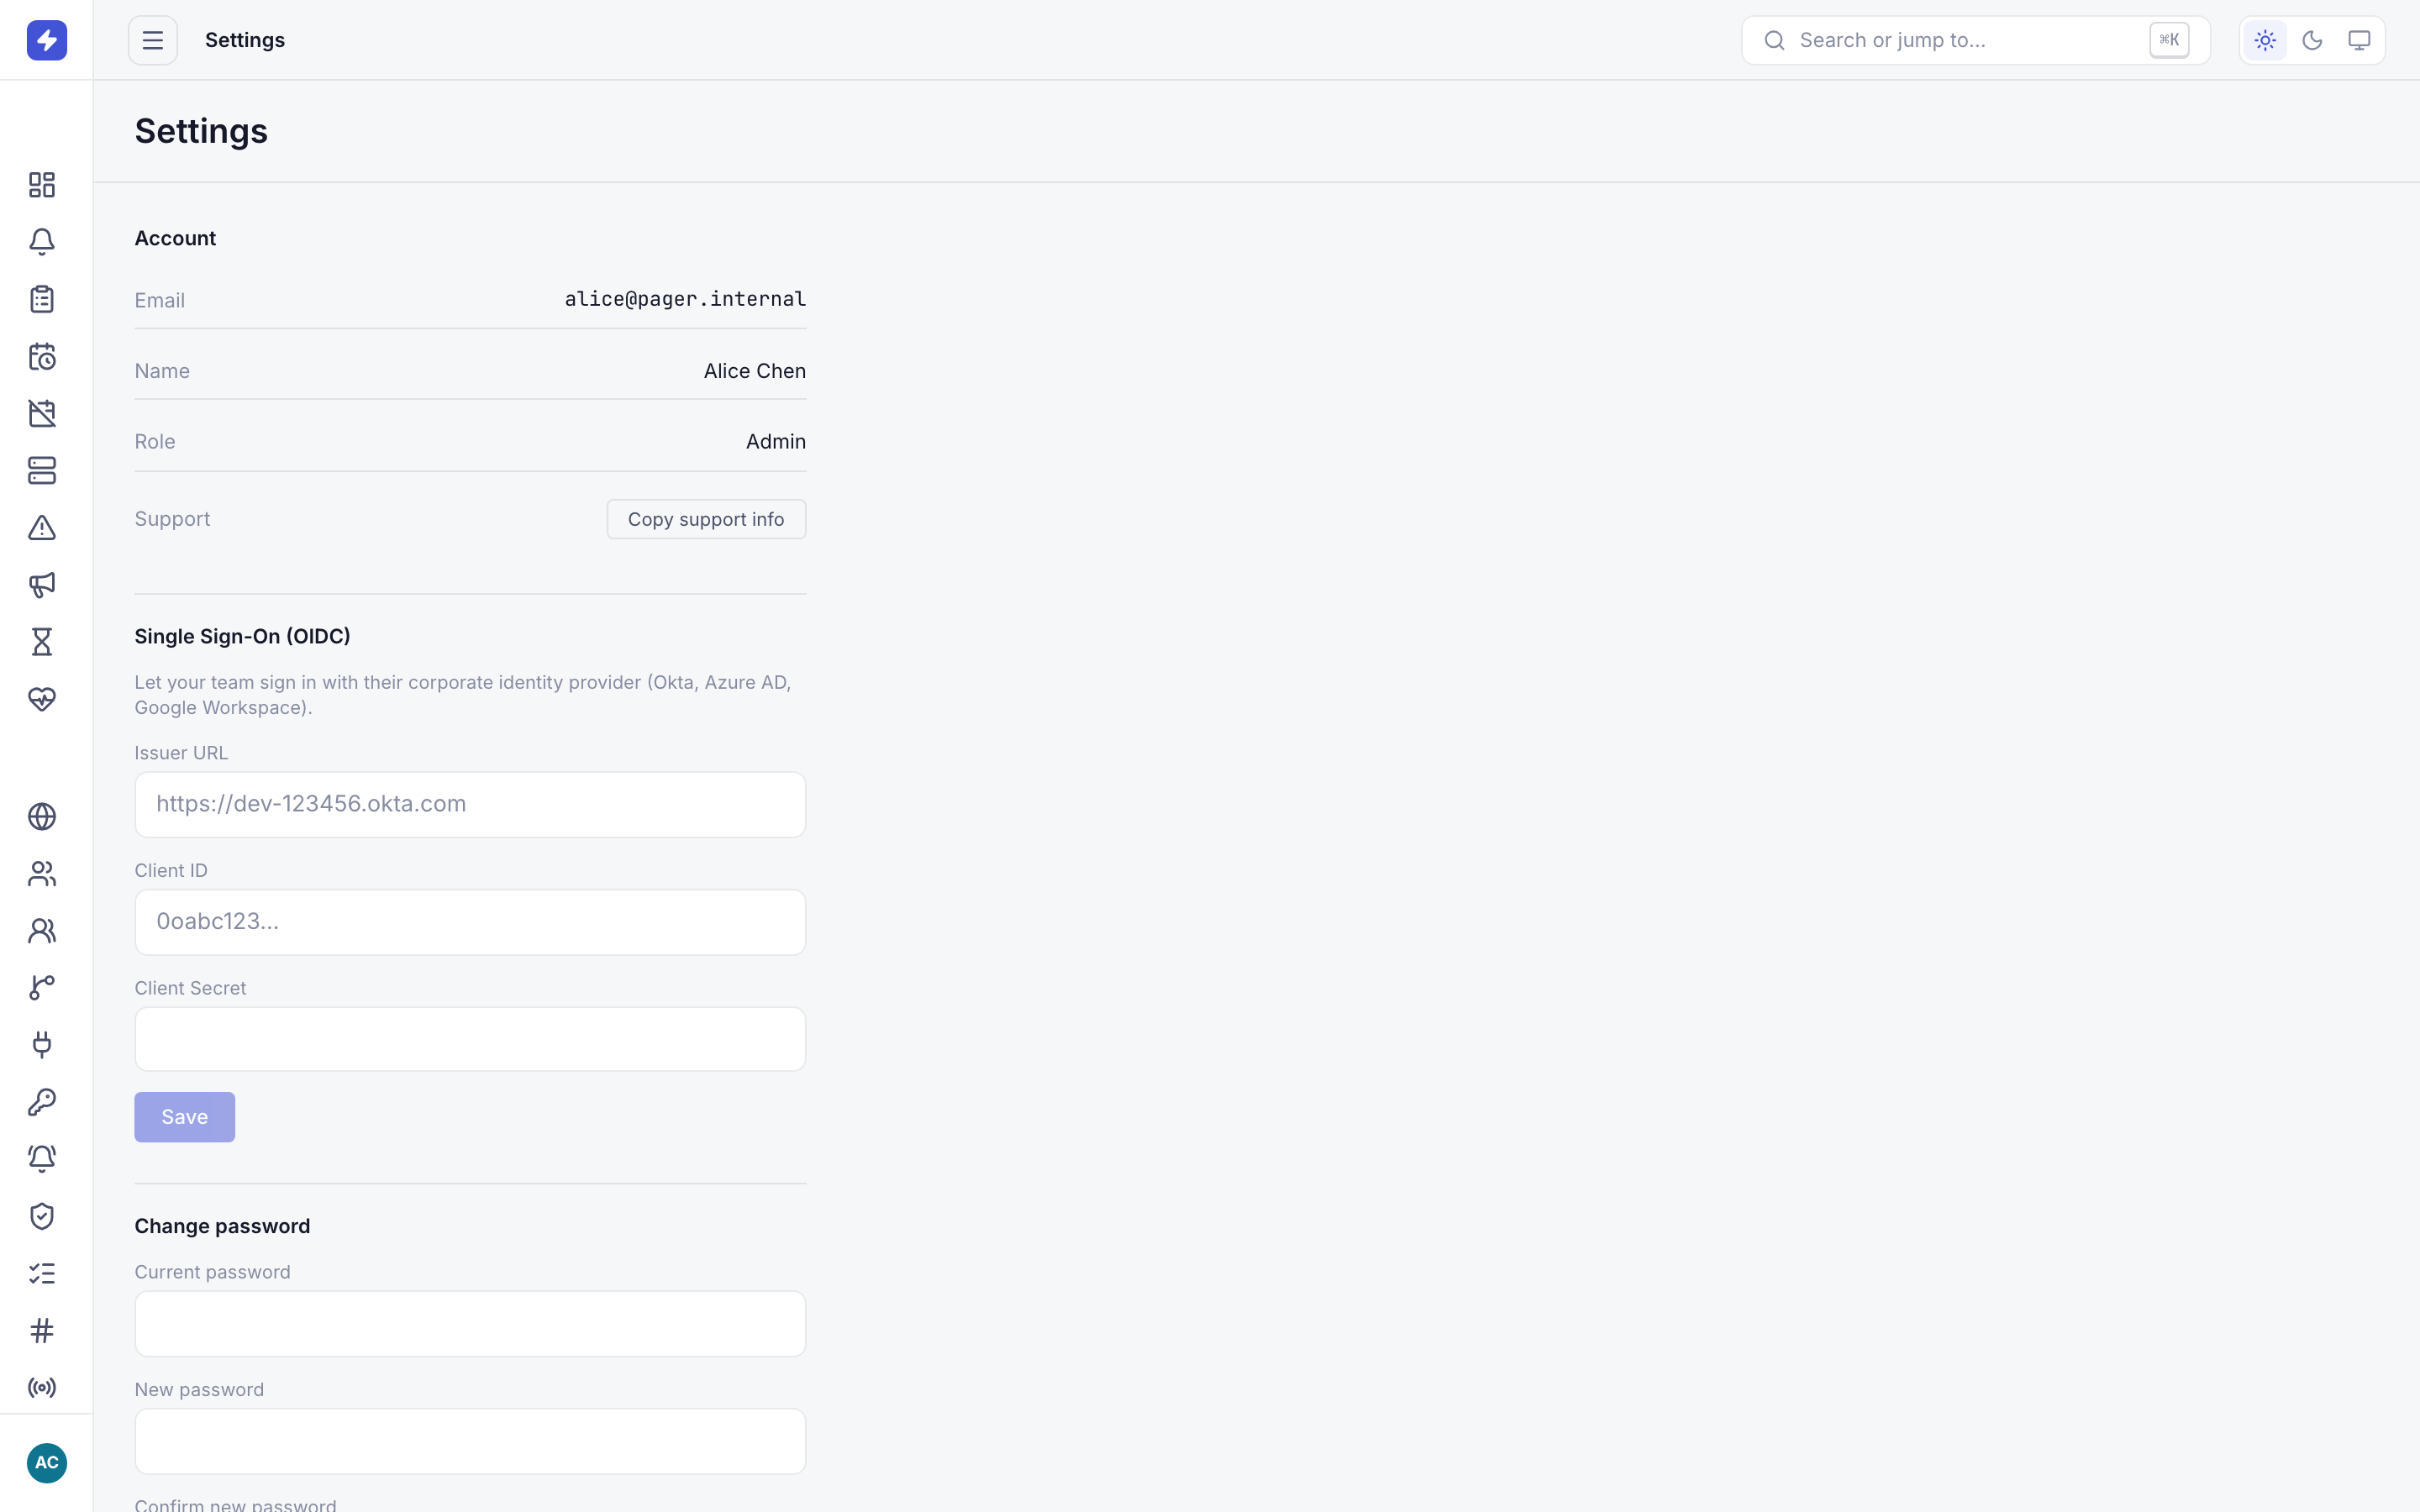
Settings holds your account details, SSO (OIDC) configuration for admins, and security options like MFA. -
Move fast with the command palette
Press Cmd/Ctrl+K anywhere in the console to open the command palette: jump to any page, or search straight into alerts and users. During an incident it's the fastest path from anywhere to the alert detail you need.
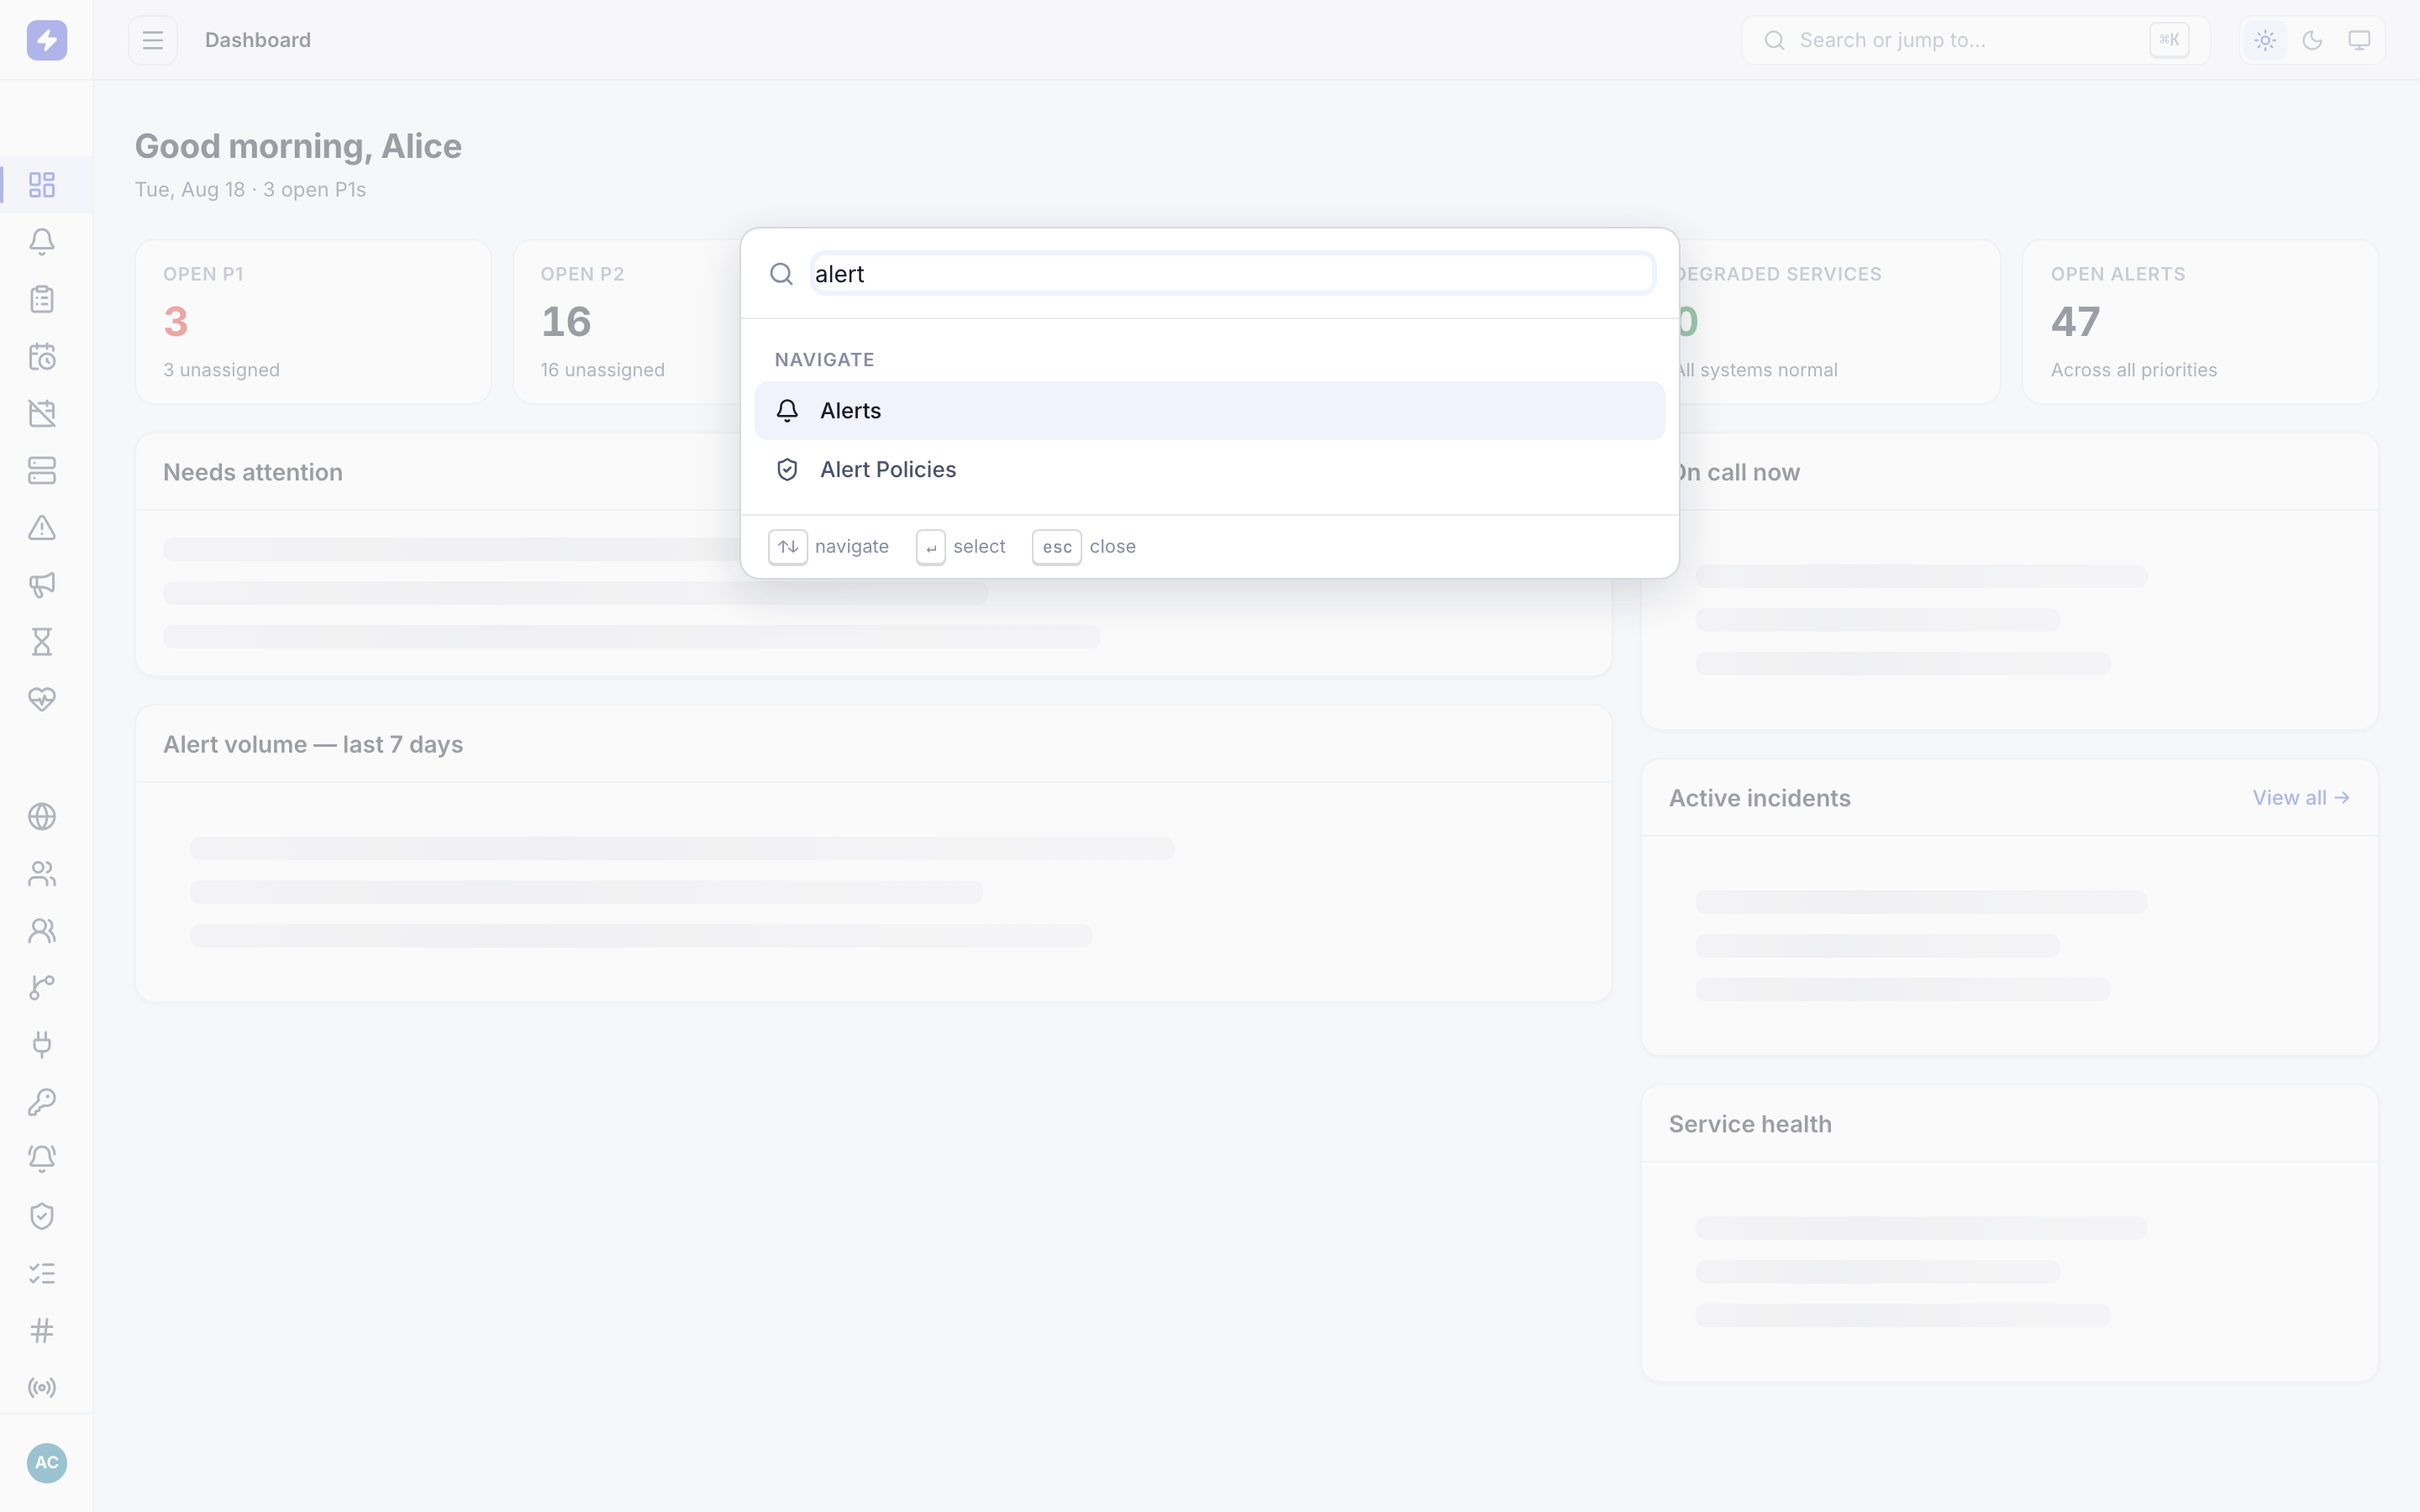
Press Cmd/Ctrl+K anywhere to jump to pages, alerts, and users from the command palette. -
Understand team scoping
Non-admin users see and act on their own team's resources plus global ones (resources with no team attached, like shared schedules). They can't touch another team's alerts, schedules, or services — and reports only show their team's data. Admins see everything, and the All teams toggle on list pages widens any view to the whole workspace when you need the cross-team picture.
TipIf a user reports "missing" alerts or schedules, check team assignment first — most visibility complaints are scoping working as designed. Flip on All teams to confirm the data exists, then fix the membership.